In this article, I will explain how to install the Deployable Package created with Build, which is the last step of moving the developments we made from Visual Studio for Dynamics 365 Finance and Operations to Test and Live environments, to Asset Library and then how to carry this package to test and live systems. I talk about performing a simple development movement with this article. Of course, there are too many details here. There are many steps that need to be examined, especially when problems arise.
This process may be more troublesome compared to the old version, but it is definitely a better method. It will be difficult for customers who still develop live and move codes to live every day, but they should definitely switch to moving at least once a week. Even for the old version, we recommend moving to live once a week (twice at most). In this version, moving to live more frequently causes a great loss of time. The problem I usually see in projects that require intervention to live too much is that your test and design stages are insufficient. Developments that are not well designed and tested, constantly create a need to intervene to live environment. With this work logic, you cannot create projects in the new version.
In the third article of this series, we downloaded the Deployable Package, which was the result of Build. We can now upload this package to Lifecycle Services. Log in to the LCS and select our project. Open Asset Library from the menu.
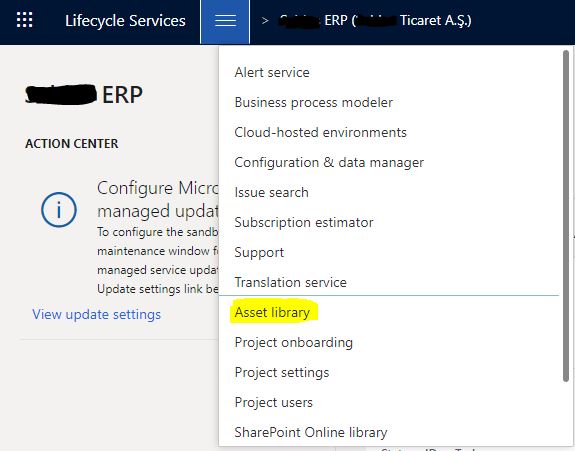
Image-1
Open the Software Deploable Package tab. Open the new package download page by clicking +.
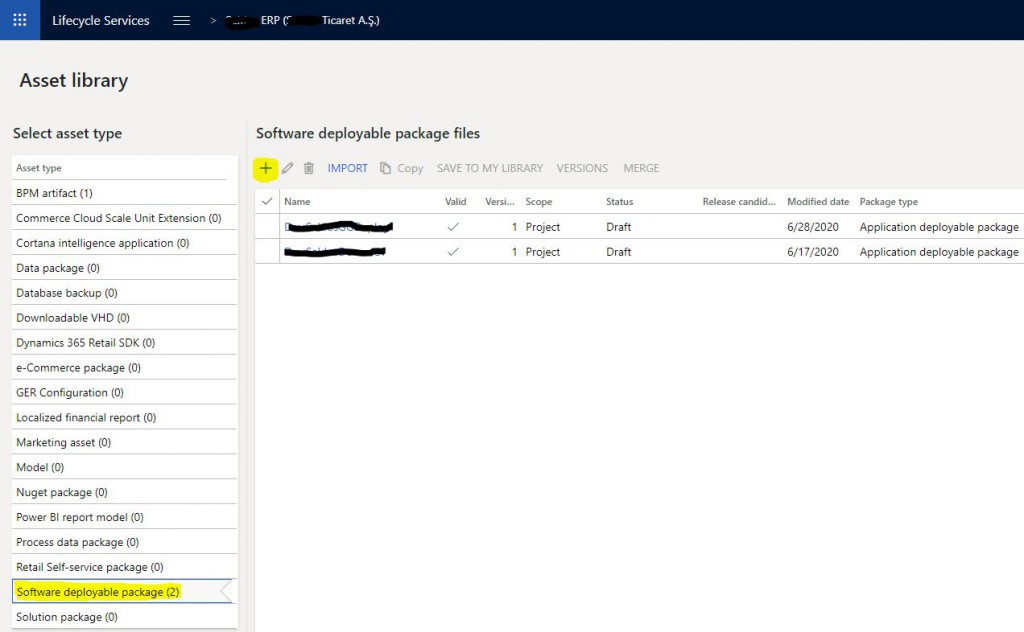
Image-2
On the page that opens, enter a name and description. It is useful to set a standard here. Click Add a file.
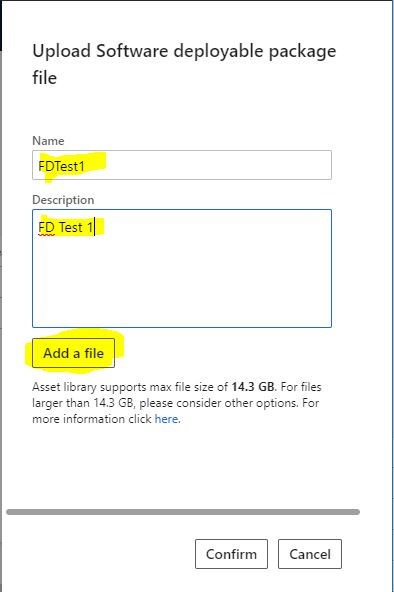
Image-3
Select the package you downloaded.
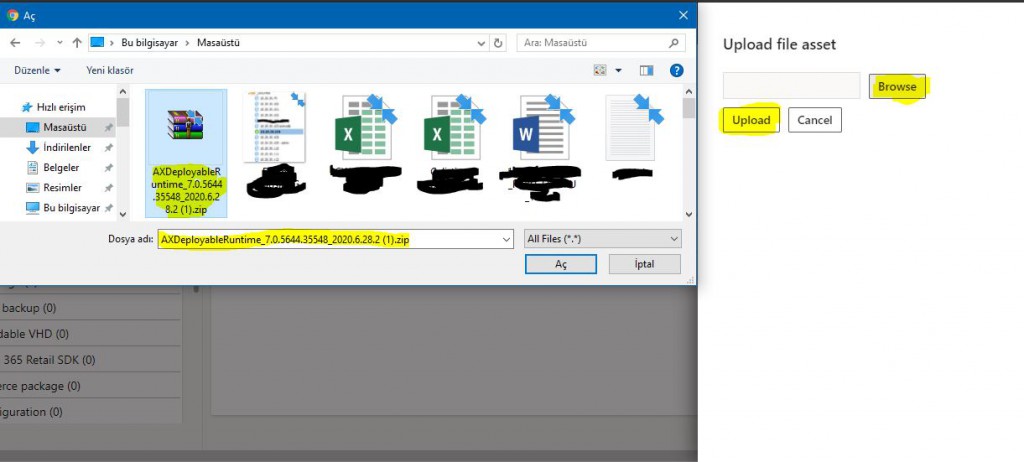
Image-4
After the installation is complete, click Confirm.
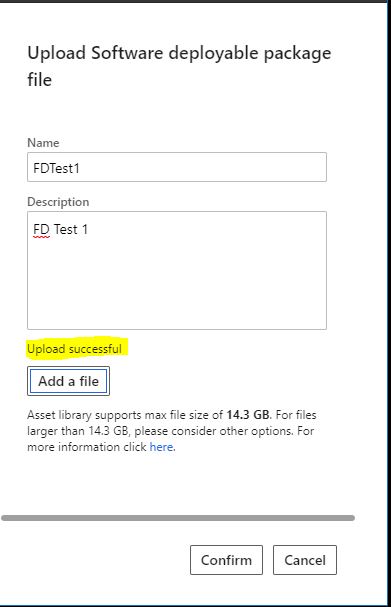
Image-5
Our package appears in the list. It is not yet confirmed. After a few minutes the Valid part will also be checked. Now we can install this package in our test and live environments.
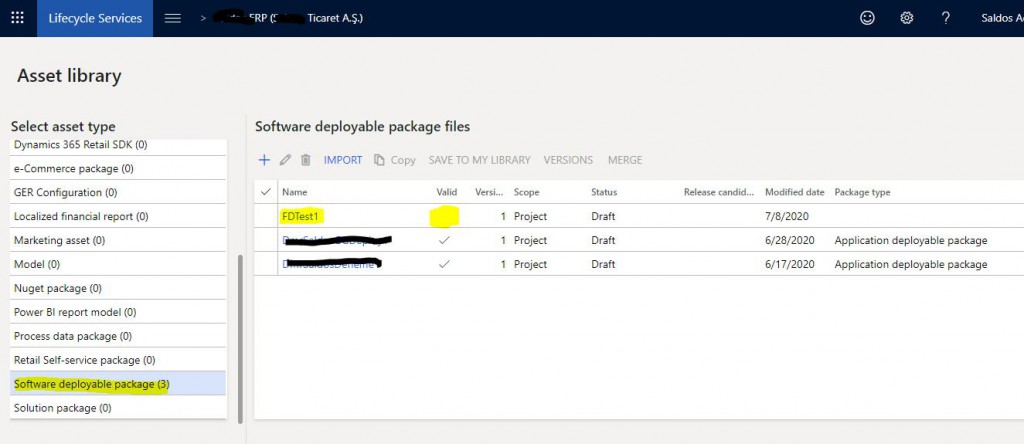
Image-6
Since it is not live in this environment, I will first show it from the test. The same steps are required for live as well. Open your SANDBOX Test environment by clicking Full details.
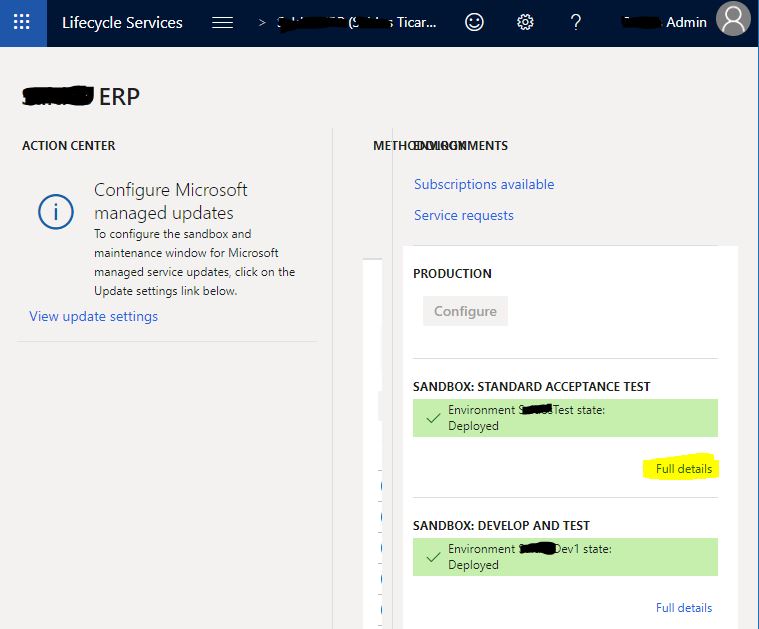
Image-7
Click Maintain-> Apply updates.
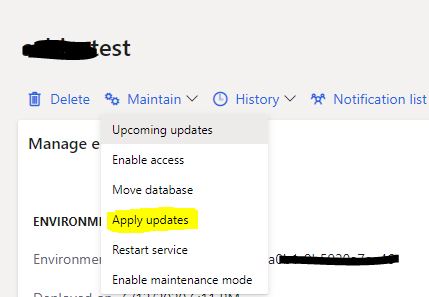
Image-8
Select the package you installed from the window that opens. Apply is not active without naming it. You need to specify a suitable name format. In the new version, one of the most difficult things seems to be naming. You have to give names so many times that it is difficult to set and apply rules everywhere. After you click Apply, the test environment will automatically start to install the package and you will not be able to access the environment for at least 1 hour. You should be aware of that. You can follow the status of the installation process on the detail page of your environment.
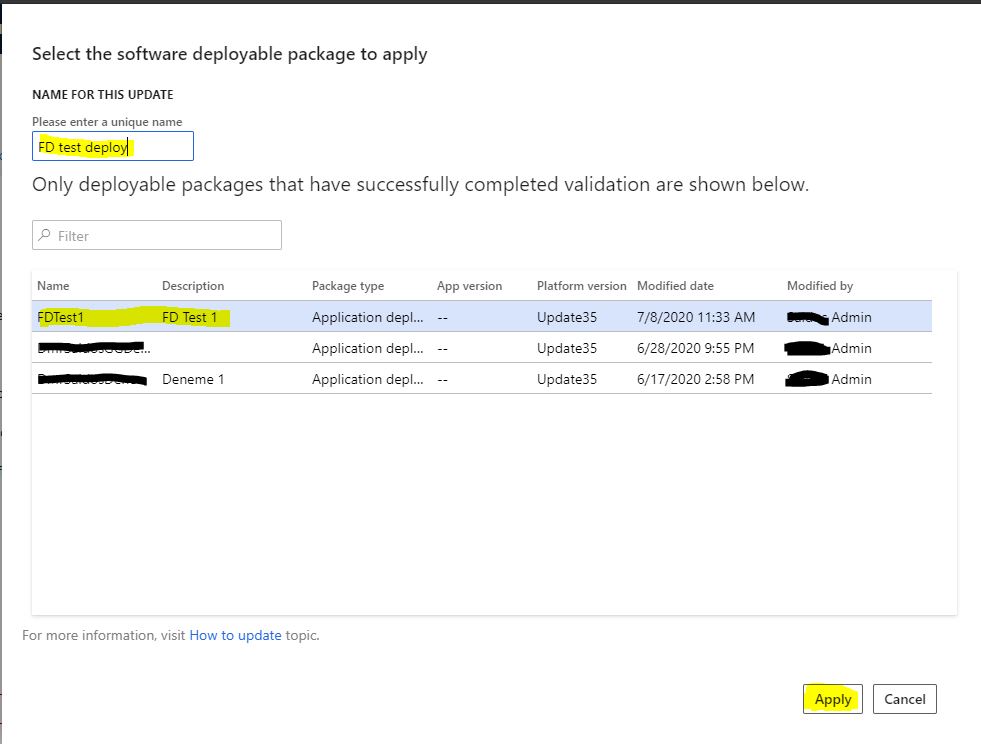
Image-9
The process of making the package live is the same, except there are two differences. Firstly, you need to mark the Package as Release Candidate. Second, you need to set the date you want the package to go live. This is done by using the Schedule button. I could not provide an image of it because it was not live in this environment yet.

Image-10
In this article, we completed the process of moving a development environment to test and live. Of course, I explained it through a very simple and problem-free scenario. In real life, things are not that simple, but not so difficult as well. There are many tools to solve problems. Being organized is very important. You should pay attention to naming and standards. I will continue to explain the details and solution methods of this whole process. I hope it is useful for you.
Regards.
www.fatihdemirci.net
TAGs: Microsoft Life Cycle Services, LCS, Azure, Azure DevOps , Release Candidate, Deployable Package, Microsoft Dynamics 365, MsDyn365FO, MsDyn365CE, MsDyn365, Dynamics 365 Insights Power BI, Power Automate, Power Apss, Power Virtual Agents, what is Dynamics 365, Dynamics 365 ERP, Dynamics 365 CRM


