What is Dynamics 365 Finance and Operations Data Entity and how is it created?
In this article, I will try to explain what the Data Entity is and how it is created with X++. First, let’s talk about what Data Entity is.
Data Entity: We can summarize it as a meaningful data set. Especially with Ax2012, the data structure was divided into many tables in accordance with the normalization logic. For this reason, many tables need to come together in order to see certain data and to perform operations. Data Entity allows us to bring these data sources together and perform transactions over a meaningful data set. As in our example, we have 3 tables related to the book, and these are actually an interrelated Data Entity and we can see these tables in a single structure and take action.
It has a lot of usage areas. I will try to explain them in time. Let’s learn how to create a new Data Entity from Visual Studio. I created a sample library project for my YouTube channel. I will continue on that.
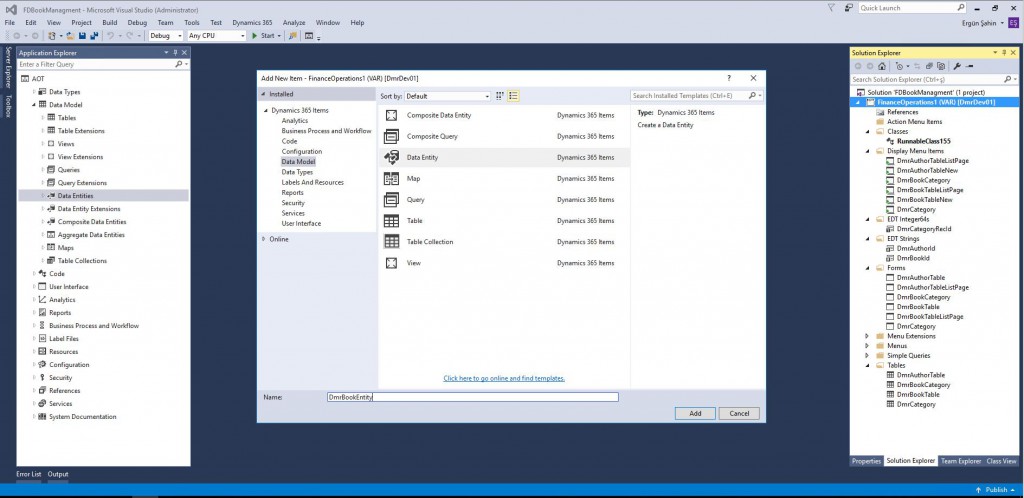
- Right click on the project and select Add > New item to open the Add New Item dialog.
- Select Data Model > Data Entity and define the name Data Entity.
- Click Add and open the Data entity wizard.
Image-1
Select the main data source from the Primary datasource field. There are many automatic definitions. There are five options in the Entity Category field. You can select one of them depending on the type of your data.
- Parameter: Used for parameter data.
- Reference: Used for reference data. Such as units, dimensions.
- Master: Used for master data. Such as Customer, Supplier, Stock etc.
- Document: Used for study data. Such as sales order and logs.
- 5. Transaction: Used for transactional data. Such as customer transactions.
Image-2
In our example, I chose Master since the main Data Entity will consist of master data. Click Next to proceed.
Image-3
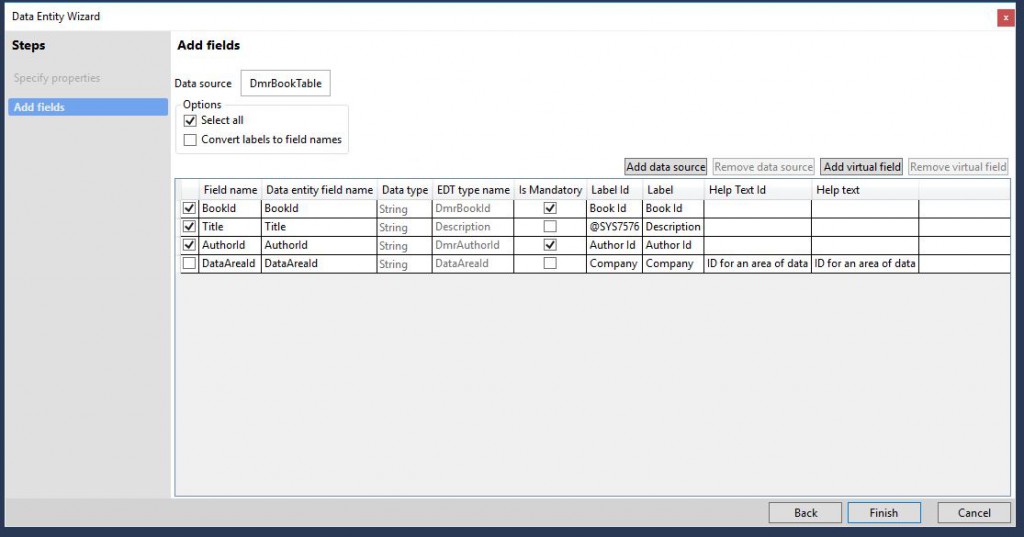
Here there are the fields of the table we selected as the data source. We can check or uncheck the ones we want. In addition, features such as Label Is Mandatory come from the automatic table. You can change them if you want.
Image-4
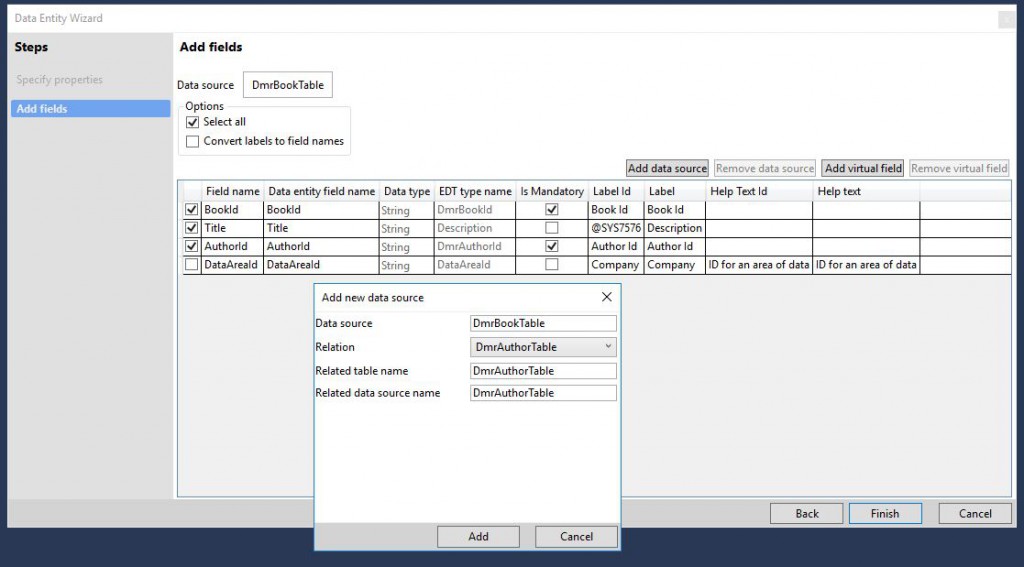
Open a new data source selection window by clicking the Add Data Source button.
Image-5
Select the DmrAuthorTable table from the window that opens. Relation is required for the connection of tables, so select that too.
Image-6
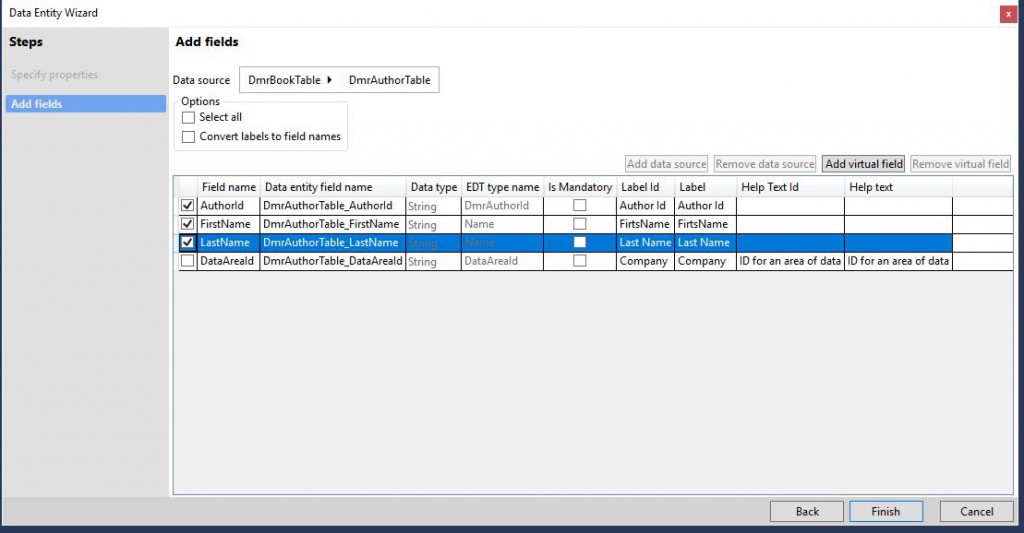
When we add the new data source with Add, the following image appears. Now you can add and remove the fields of the new table.
Image-7
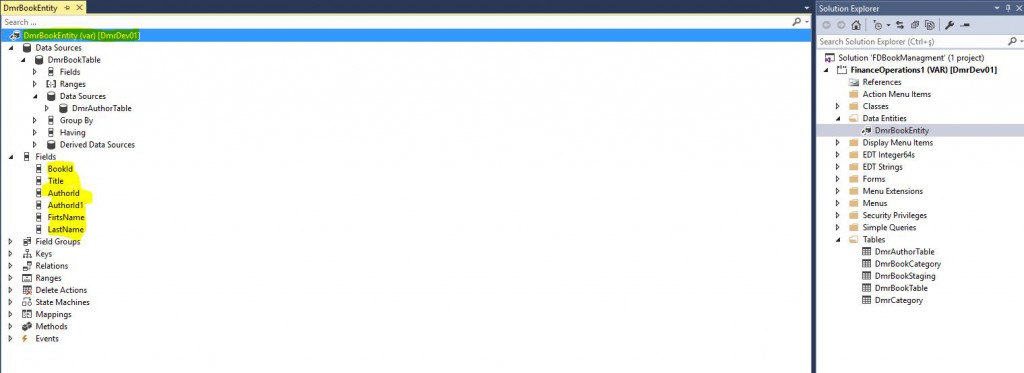
When you click Finish, Data Entity will be created. The fields and data sources we have selected have been created. We can also edit from here.
Image-8
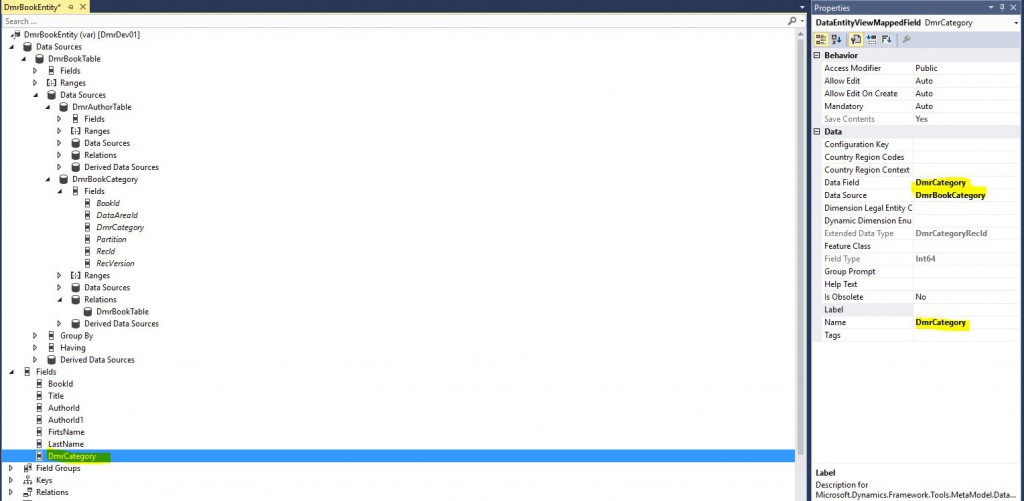
To add one more data source, right click and select Add New Data Source. Add the DmrBookCategory table. I can do the operations I just made on the screen from here as well.
Image-9
After adding it, define the table name and relationships. Then, right click Fields and select Add New Fields. Add a field from the DmrBookCategory table.
Image-10
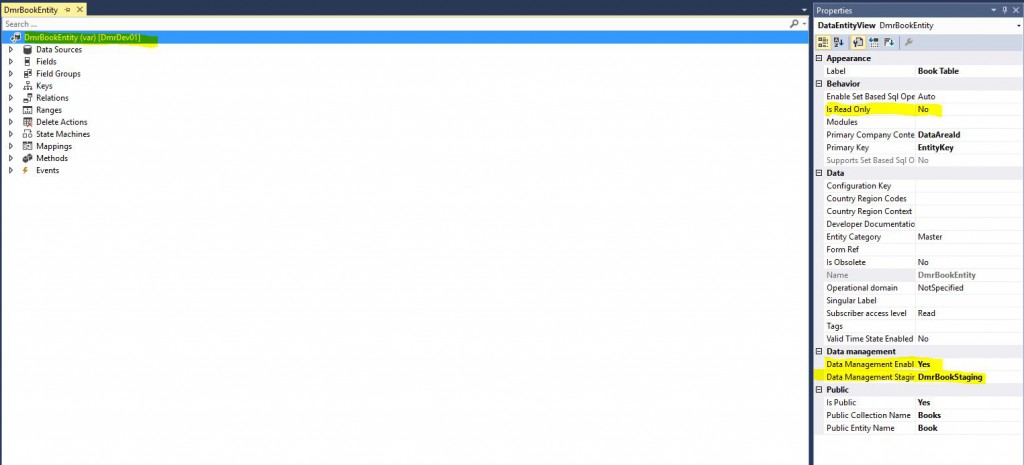
Data Entity is created. It is ready to use. Of course, there are many other features besides these, I will try to talk about them over time. Here, especially if you use Is Read Only in operations such as data transfer, you should definitely set it to Yes. The default value is No. It’s easy to miss. Be aware of that, otherwise you will have a hard time.
Image-11
In this article, I tried to explain what Data Entity is and how to create a new Data Entity. I will continue to explain Data Entities, which have many uses.
Regards.
www.fatihdemirci.net
TAGs: Data Entity, LCS, Azure, Microsoft Dynamics 365, MsDyn365FO, MsDyn365CE, MsDyn365, Dynamics 365 Insights Power BI, Power Automate, Power Apss, Power Virtual Agents, what is Dynamics 365, Dynamics 365 ERP, Dynamics 365 CRM
