Posts Tagged ‘ Power Apps

How to Set Up Azure DevOps Connection via Visual Studio in Dynamics 365 Finance and Operations Development Environment?

In this article, I will talk about what needs to be done after creating a new development environment. The first step is to log into Visual Studio. Then, I will explain how to connect to the Azure DevOps project. I intend to summarize the steps to be taken before starting development in a few articles.

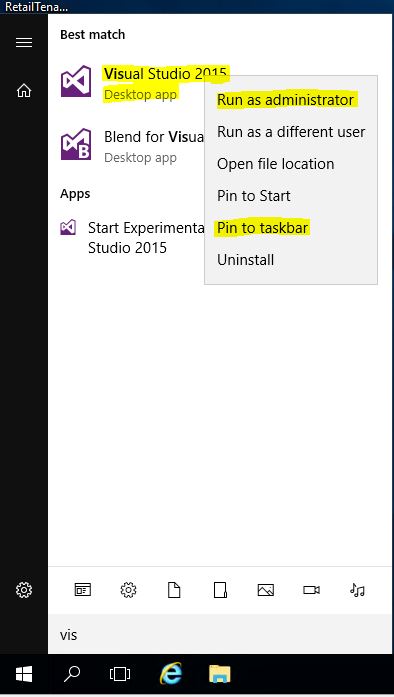
In these installations, I will use the development environment we built on Azure. I explained how to deploy a development environment in my previous articles. Once the machine is deployed, you can download and connect Remote Desktop connection information via LCS. Currently Visual Studio 2015 comes installed, but there will be a migration to new versions of Visual Studio soon. Visual Studio must be opened with Run as administrator. For convenience, right click on Visual Studio and click Pin to taskbar.

Image-1

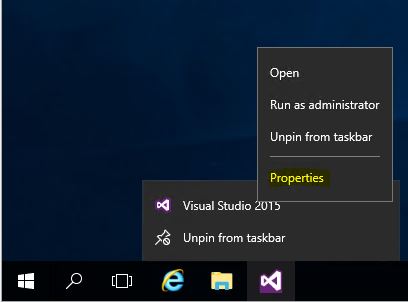
Right click on the Visual Studio icon in the task bar and click Properties

Image-2

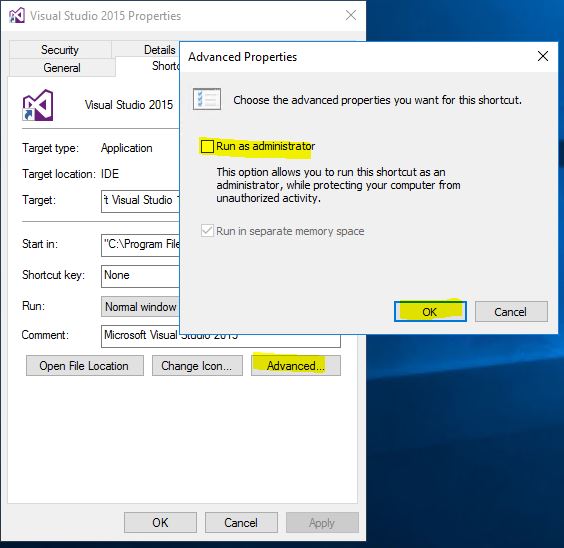
Click Advanced from the screen that opens. Check Run as administrator and click OK. This eliminates the need to do this every time you open it. Also, if you forget this, some functions do not work, and you will waste time.

Image-3

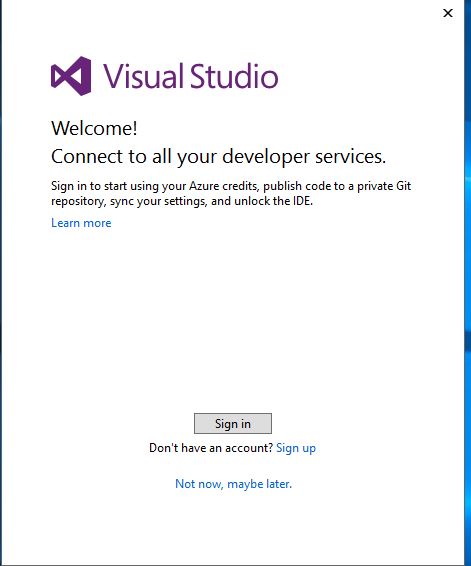
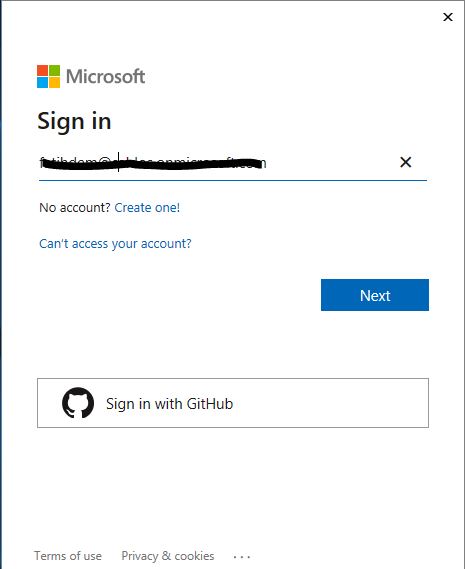
We need to Sign in with an account authorized for Visual Studio.

Image-4

I use an account created for this project.

Image-5

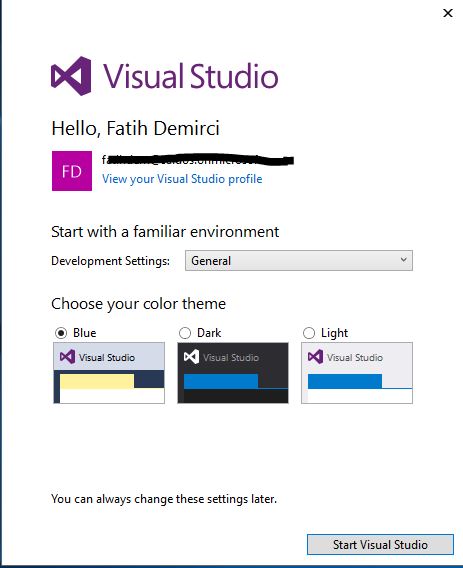
Software developers like to use Dark themes, but I use the classic theme because I have difficulty reading on dark screen.

Image-6

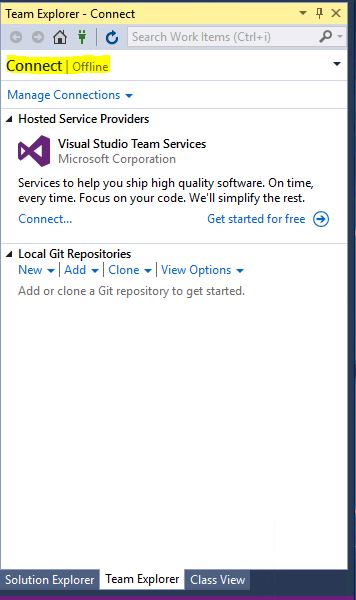
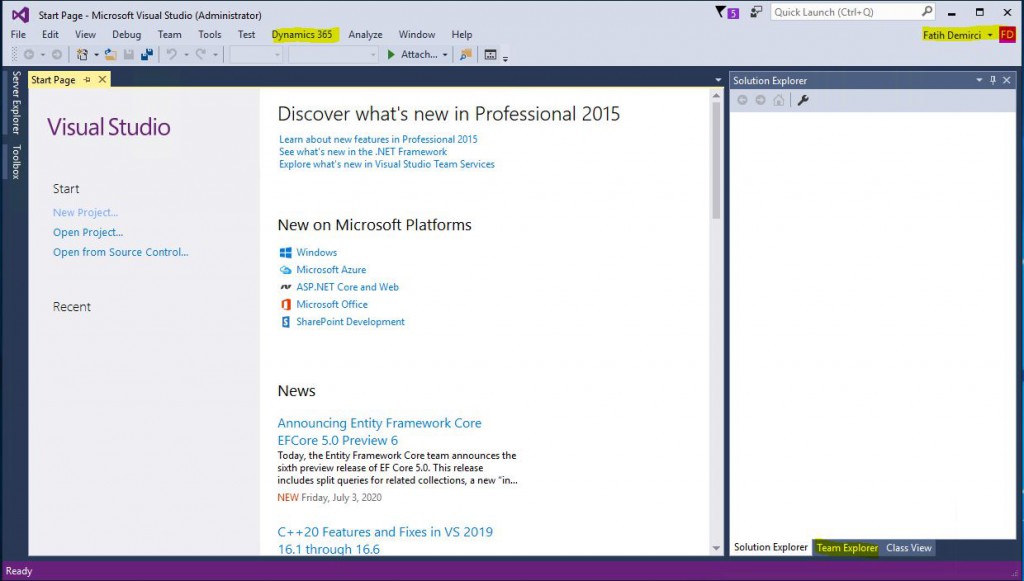
If there is no problem with your user’s authorization, your login will be completed. Dynamics 365 menu is available. I will talk about the menus here in my next articles. Now open the Team Explorer screen.

Image-7

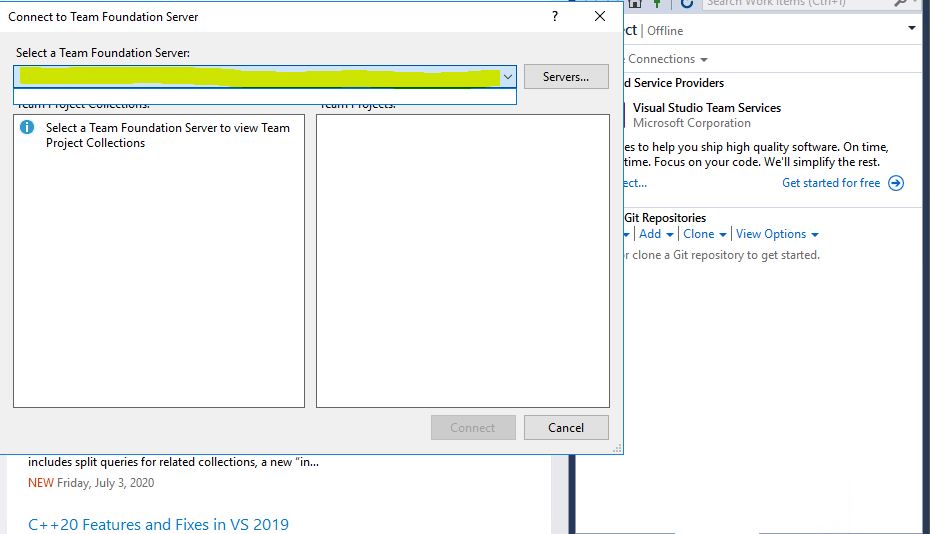
Open the connection page with the Manage Connections link.

Image-8

Nothing appears in the Select a Team Foundation Server section. The reason for this is that the user login I used to connect to Visual Studio is not authorized for the Azure DevOps project that we connect to LCS.

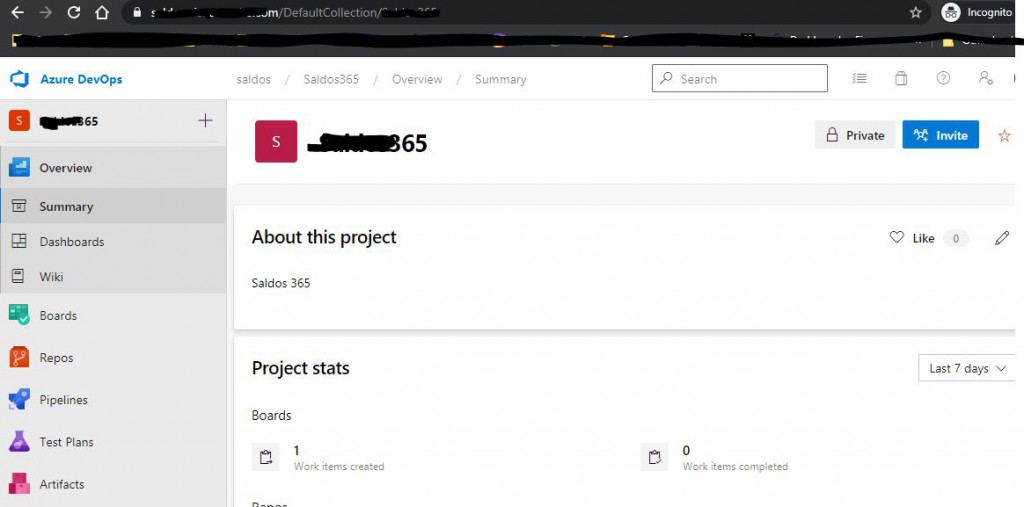
Image-9

Open the Azure DevOps project and invite the user to the project by clicking Invite.  Of course, you must log in with an authorized user in Azure DevOps. Since I have the information of the Admin account, I logged in with it.

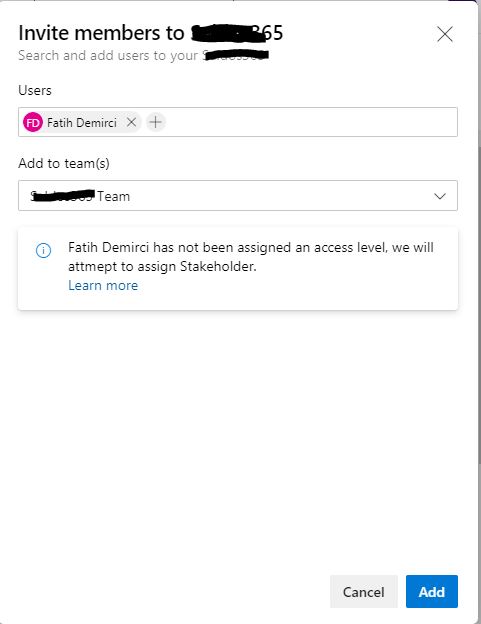
Image-10

When I type my username from the search, it automatically appears. I select and add it.

Image-11

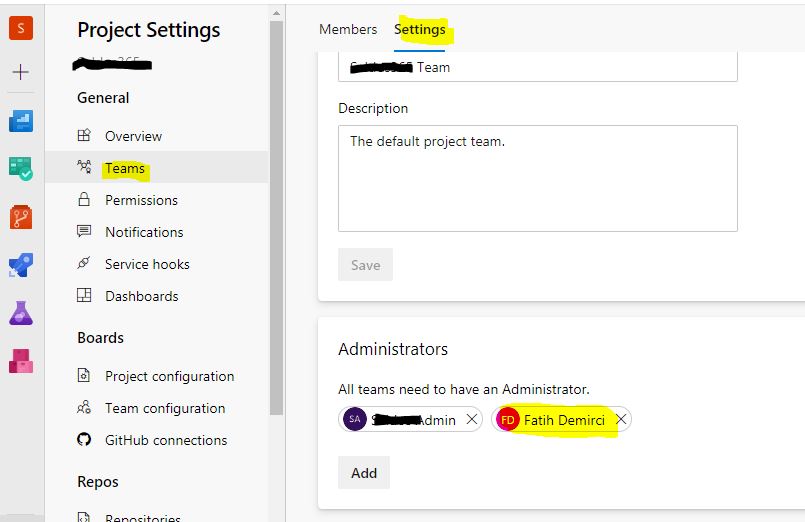
Also, since I want to have Admin rights in this project, I add my user to the Administrators section as shown in the picture.

Image-12

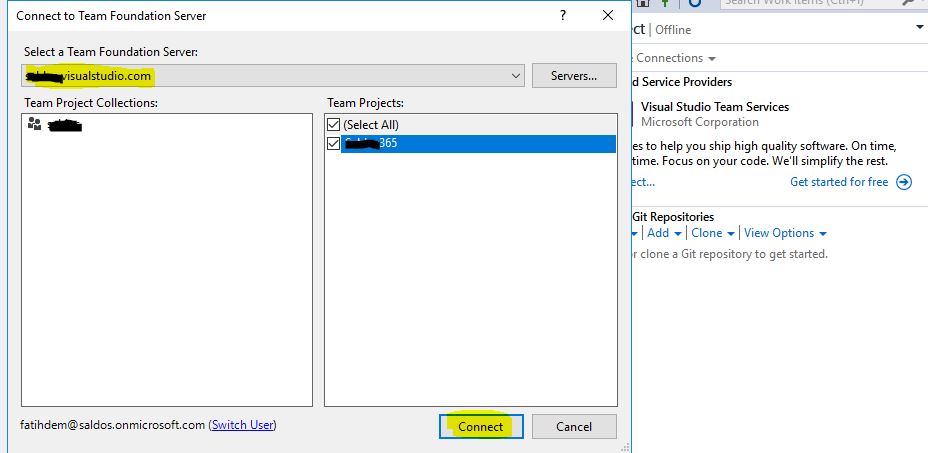
When I looked back to Visual Studio, I could see my project. To do this, you need to restart Visual Studio. Refreshing doesn’t work.

Image-13

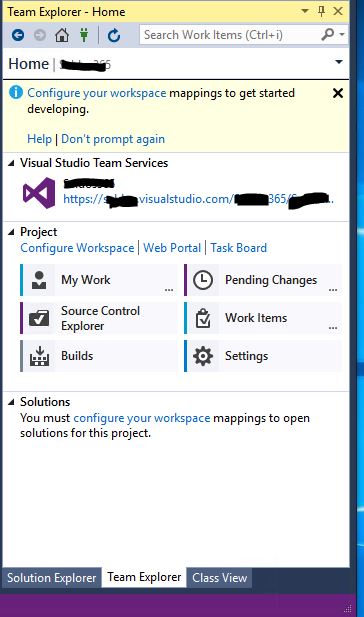
When you click Connect, you will be connected to your Azure DevOps project. You will see the link under Visual Studio Team Services as shown below.

Image-14

In this article, I talked about the initial settings required for a new Devbox. First of all, it is very important to open Visual Studio with admin rights. It is often forgotten, so I explained how to make a definition to automate it. Then, we established the connection to our Azure DevOps project, which is required for the version control of our application. Now we can move on to the other settings. I will talk about Model, Package and Branch setups in my next articles.

Regards.

www.fatihdemirci.net

TAGs: Microsoft Life Cycle Services, LCS, Azure, Azure DevOps, Microsoft Dynamics 365, MsDyn365FO, MsDyn365CE, MsDyn365, Dynamics 365 Insights Power BI, Power Automate, Power Apps, Power Virtual Agents, what is Dynamics 365, Dynamics 365 ERP, Dynamics 365 CRM
How to Create a Dynamics 365 Finance and Operations Support Case?

In this article, I will show you how you can open a support case via Dynamics 365 Finance and Operations and access automatically-generated support records via LCS and Azure DevOps.

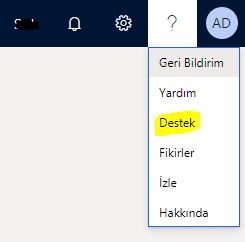
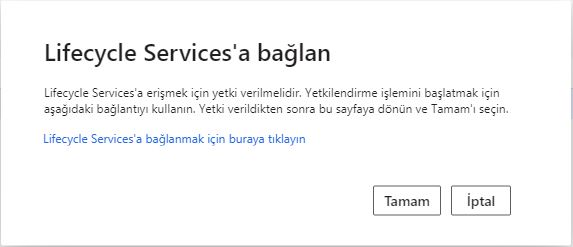
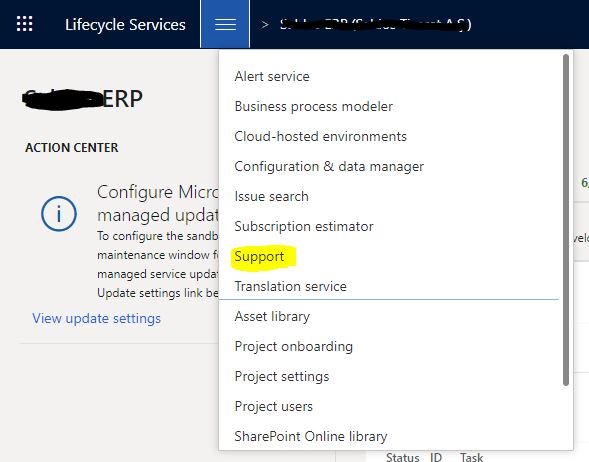
First, some basic setups need to be made. In my previous articles, I explained how to setup Help. If you follow the setups there, you can create a support case without having to do anything else. When you click the question mark and click Support, if you have not installed, the LCS connection screen will appear.

Image-1

You can click the link and establish the connection. It will be connected without entering any information here.

Image-2

When the connection is successful, the following screen will appear. You can now create a support case.

Image-3

Click on the question mark again and click Support.

Image-4

On the screen that opens, you can enter many details about your support case. First, enter the title and description of the issue.  You can create a task record and add it here. If there is a file log, you can add it. You can indicate if the issue prevents you from working. The more details provided here, the easier the solution will be.

Image-5

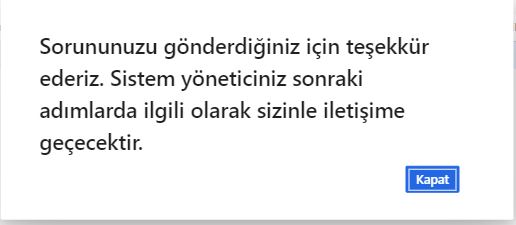
For Send to be active, you have to click Yes for the email notification. Then, when you click Send, the following screen will appear.

Image-6

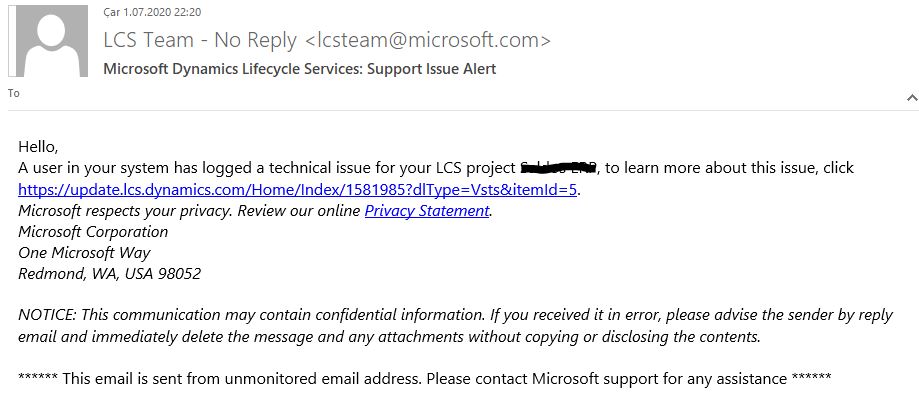
The support case you created will be sent as follows.

Image-7

To view the support request you created on LCS, open your project and click Support.

Image-8

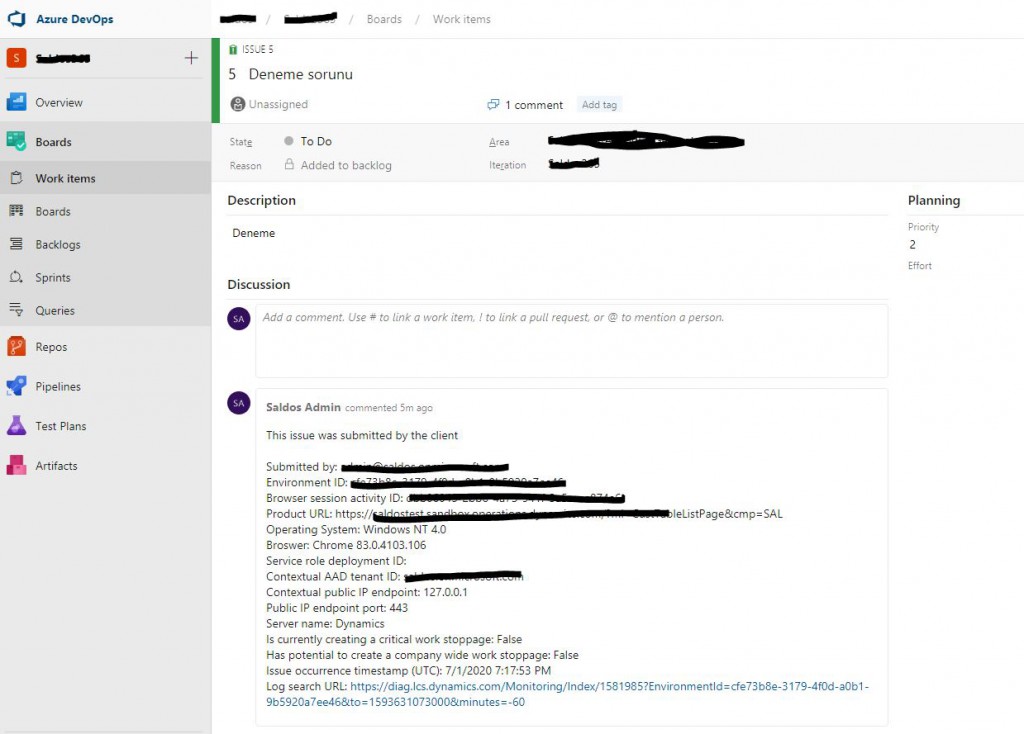
The support case you created appears in the support issues section. You can follow the actions from here. Also, a Work Item has been created in Azure DevOps. You can open Azure DevOps Work Item record by clicking directly on the support case name.

Image-9

You can also see the support case you created in Azure DevOps. From here, you can follow the necessary steps to solve it.

In this article, I tried to explain how to enter a new support case and view it via LCS and Azure DevOps. Support has always been a painful process for business applications. It’s not easy to get users who just take a screenshot of the error and post it to enter detailed support cases. However, this mechanism will reduce the IT workload and make it easier to track. For this reason, it’s best to encourage business units to use this place. For example, support cases entered here can be prioritized and resolved quickly.

Regards.

www.fatihdemirci.net

TAGs: Microsoft Life Cycle Services, LCS, Azure, Azure DevOps, Support Case, Microsoft Dynamics 365, MsDyn365FO, MsDyn365CE, MsDyn365, Dynamics 365 Insights Power BI, Power Automate, Power Apps, Power Virtual Agents, what is Dynamics 365, Dynamics 365 ERP, Dynamics 365 CRM
How to make new mobile forms on Dynamics 365 Finance and Operations web forms?

In this article, I will try to explain how to generate new mobile forms from Dynamics 365 Finance and Operations forms. In my previous article, I explained how to publish standard mobile screens and how to install Dynamics 365 Mobile App on mobile devices.

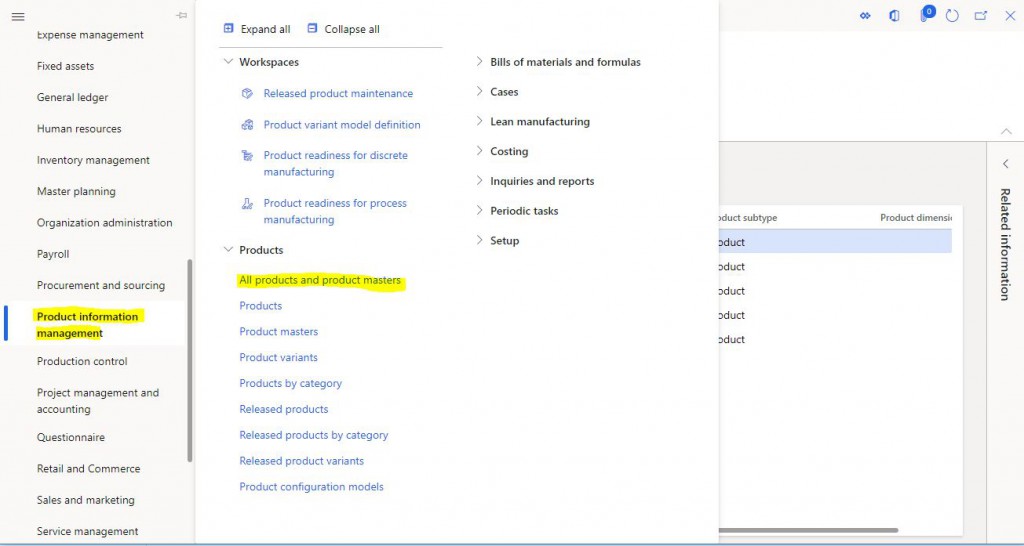
In this example, we will make a very simple listing screen. I selected the all products form as an example. Open the Product information managment -> All products and product master form.

Image-1

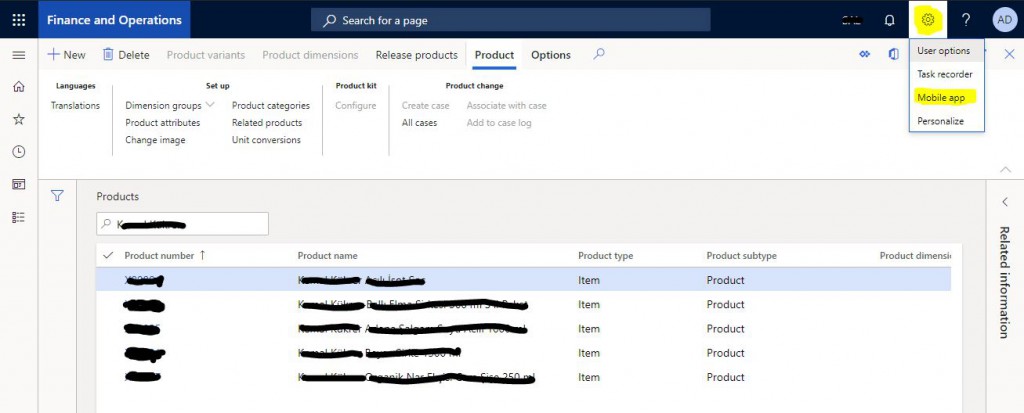
Click on the Mobile app from the settings icon.

Image-2

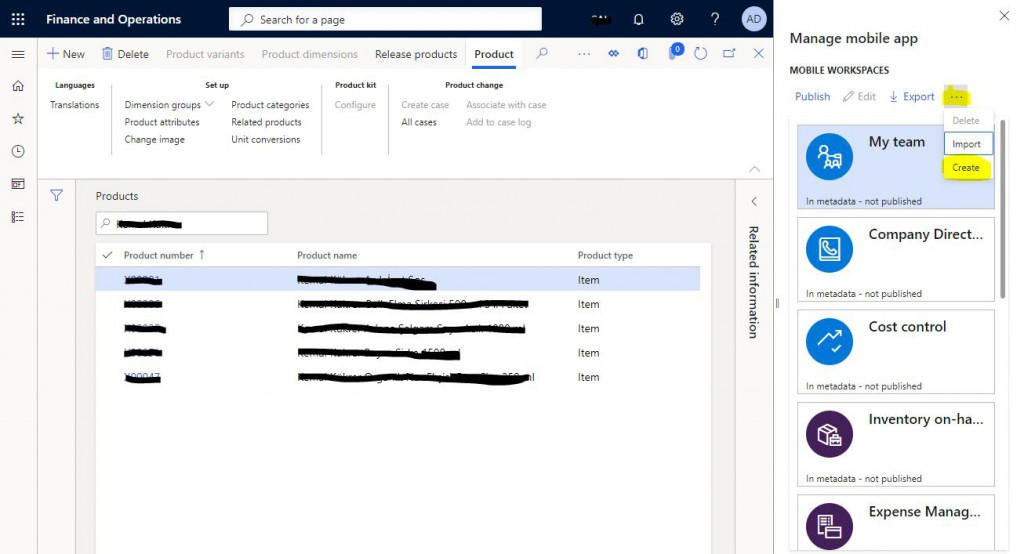
Click the ellipsis icon from the form that opens and click Create.

Image-3

Enter the information of the mobile form you want to create. Then add a page by clicking Add page.

Image-4

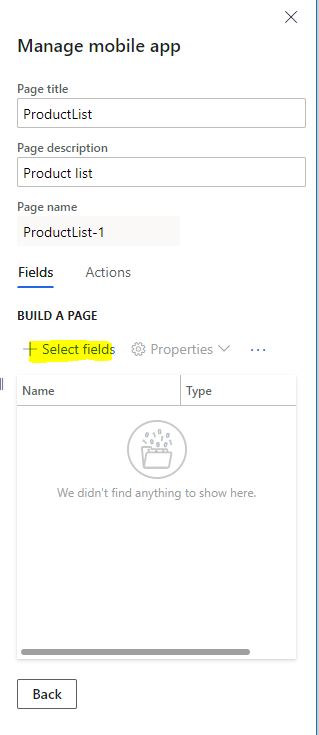
When you click Done, the page creation screen opens.  Here, click Select fields to open the screen where you can select the fields you want.

Image-5

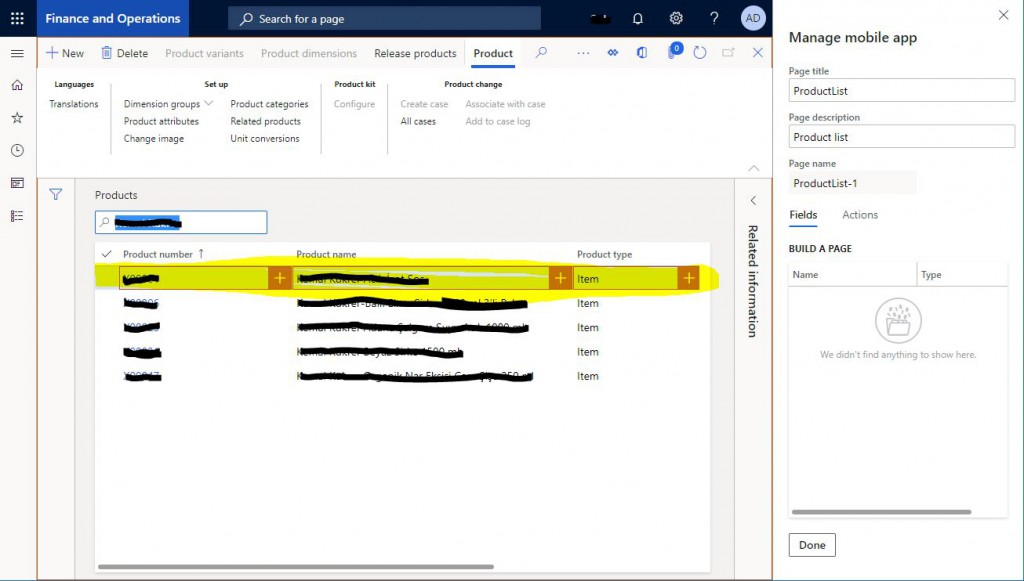
Select the fields by clicking the + icons.

Image-6

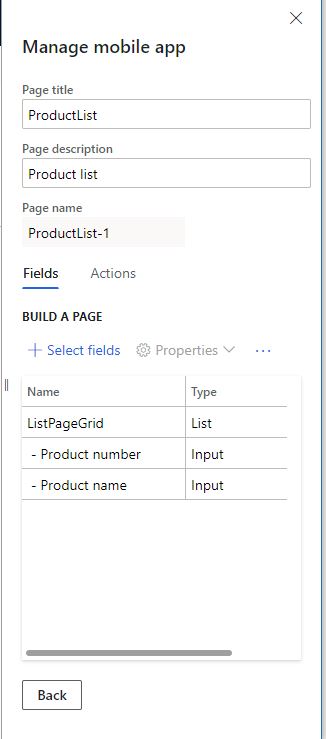
I added two fields. After finishing the process, click Back and return to the first page.

Image-7

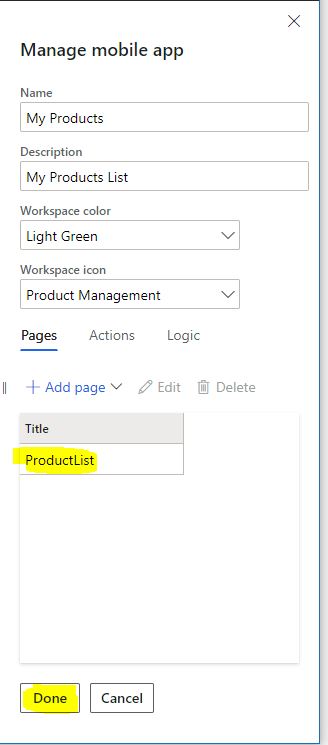
You see the page you created on this screen. You can create multiple pages.  Continue the process by clicking Done.

Image-8

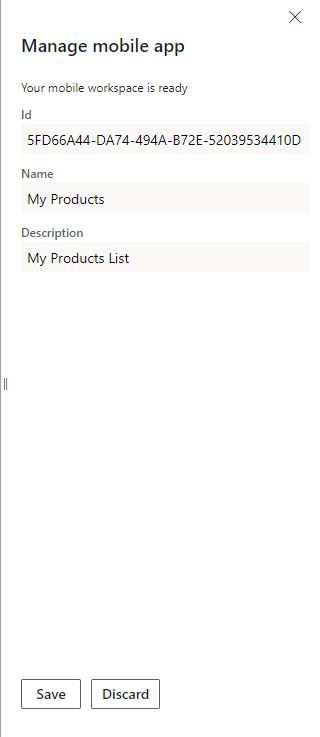
Id is created here. Complete your mobile worksheet by clicking Save.

Image-9

You can now see it in the list. Publish it by clicking Publish. You will now be able to see the product list form from the application on your phone.

Image-10

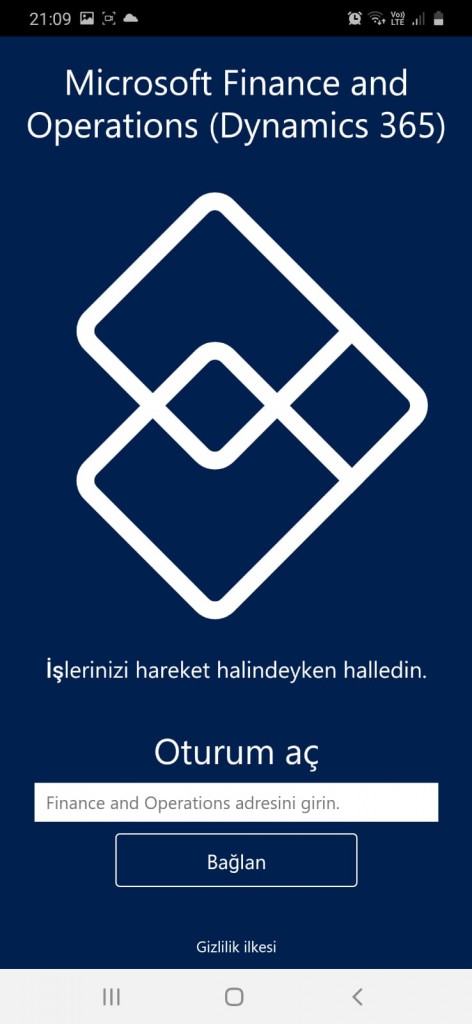
Open the application on your phone and log in.

Image-11

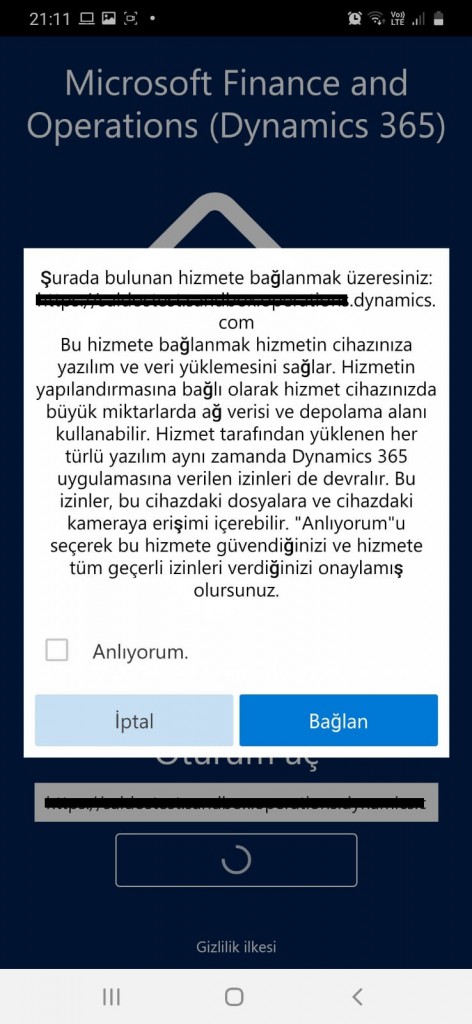
Check I understand and tap Connect.

Image-12

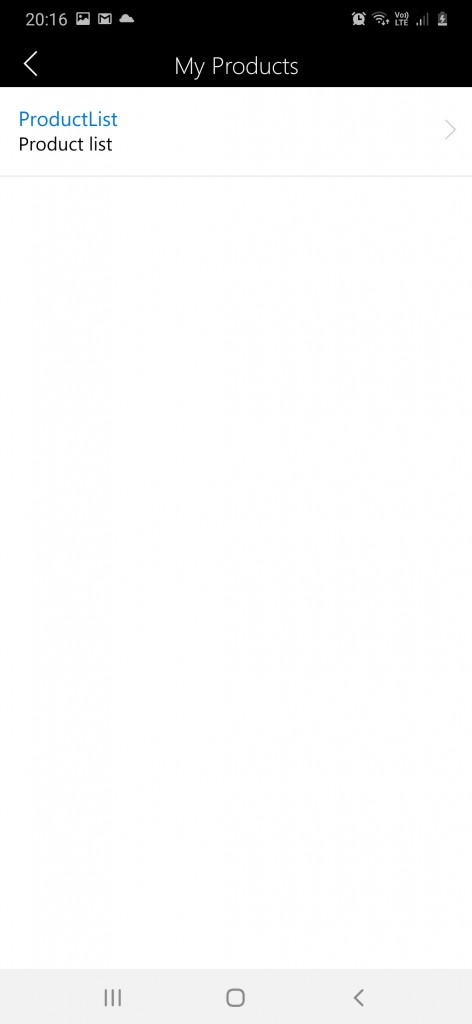
My Products appears on the page that opens. If you entered before, you need to refresh.

Image-13

Once you enter, you see the list form you created.

Image-14

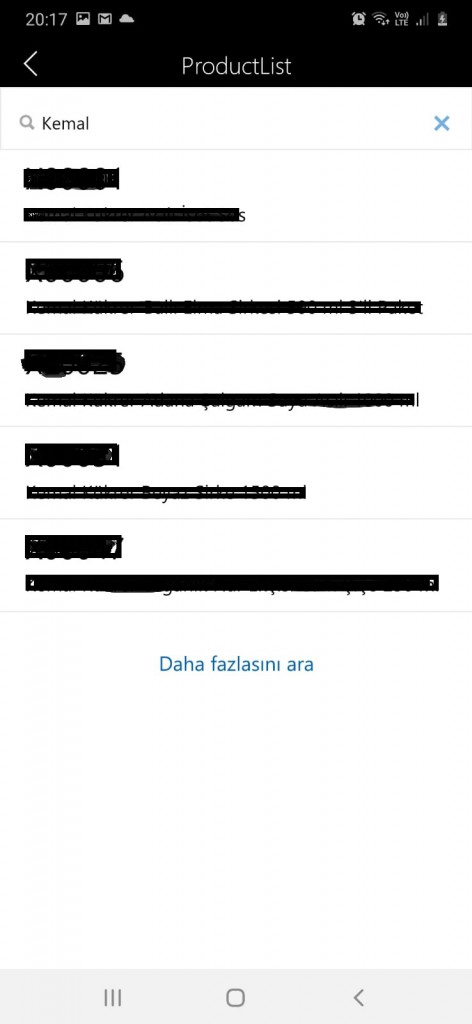
When you click and enter, your products are listed. We added two fields, and they are one under the other.

Image-15

In this article, I tried to explain how you can create mobile forms from any form. I exemplified it with a very simple form, but you can do it with forms with more complex data entries. I will also refer to more advanced examples in my next articles. Preparing such easy mobile forms will be very useful in projects. Thanks to this, many simple needs can be solved at no cost. Application consultants should learn the capabilities of this thoroughly and direct the emerging needs to this.

Regards.

www.fatihdemirci.net

TAGs: Microsoft Life Cycle Services, LCS, Azure, Azure DevOps, Mobile app, Microsoft Dynamics 365, MsDyn365FO, MsDyn365CE, MsDyn365, Dynamics 365 Insights Power BI, Power Automate, Power Apps, Power Virtual Agents, what is Dynamics 365, Dynamics 365 ERP, Dynamics 365 CRM
How to give Dynamics Deployment Services Account authorization to Microsoft Azure Subscription in order to deploy Dynamics 365 Finance and Operations?

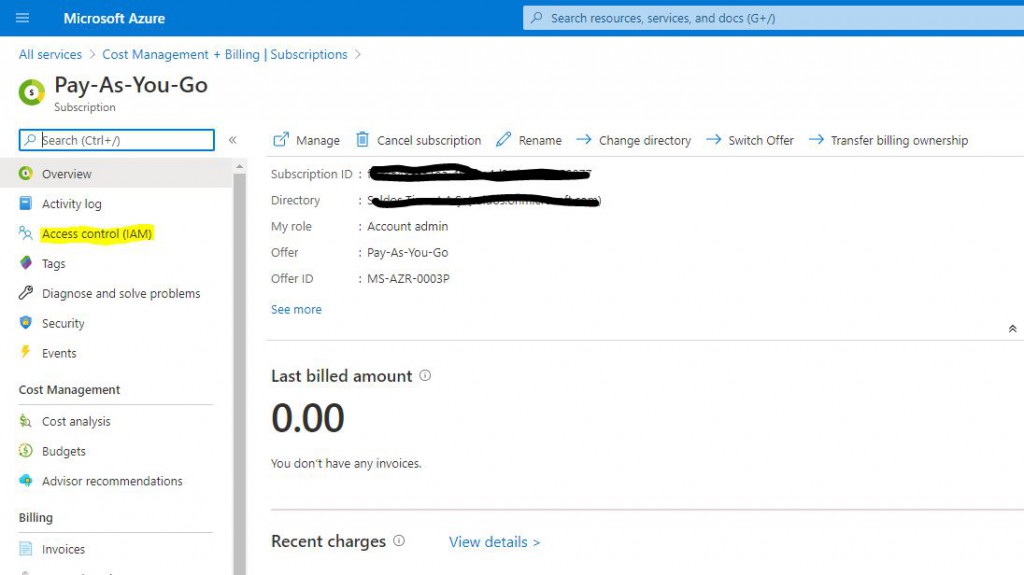
In this article, I will describe step by step how to authorize Dynamics Deployment Services Account, which is necessary to deploy a new environment via LCS. First, log into Azure Portal with the Admin account. Open Cost Management +Billing > Subscriptions.

Image-1

Select the subscription you want to authorize and click on Access control (IAM) from the screen that opens.

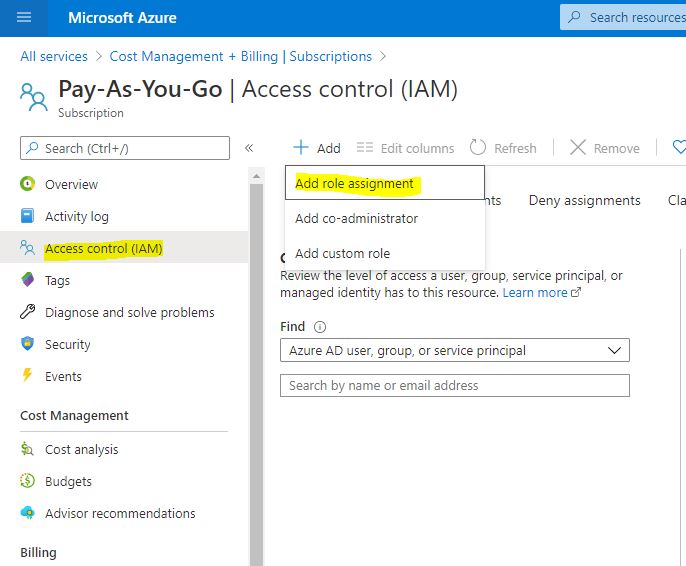
Image-2

Open the new role definition window by clicking on Add> Add role assignment.

Image-3

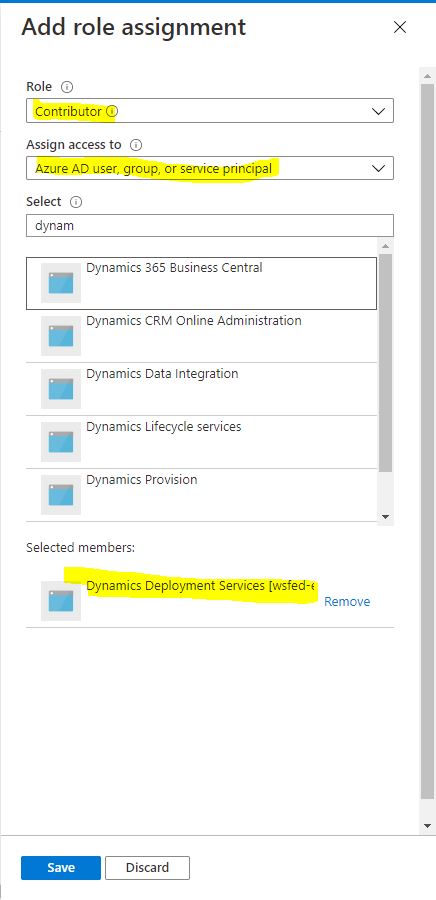
In the window that opens, select Contributor as Role. In the Assign Access to section, select Azure AD user, group, or service principal. When you type Dynamics in the Select section, the options will be automatically available. From there, select Dynamics Deployment Services [wsfed-enabled] and click save.

Image-4

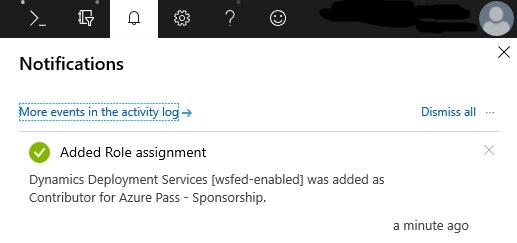
When the process is completed, you will see the information below.

Image-5

In this article, I tried to explain how the Dynamics Deployment Services Account is authorized over Azure, which is one of the necessary steps to deploy a new environment. This step is usually skipped and an error is received in the Deploy operation over LCS. It is useful to give this authorization beforehand.

Regards.

www.fatihdemirci.net

TAGs: Microsoft Life Cycle Services, Dynamics Deployment Services Account, LCS, Azure, Azure DevOps, Project onboarding, Microsoft Dynamics 365, MsDyn365FO, MsDyn365CE, MsDyn365, Dynamics 365 Insights Power BI, Power Automate, Power Apps, Power Virtual Agents, what is Dynamics 365, Dynamics 365 ERP, Dynamics 365 CRM
What are the Visual Studio Basic Settings for Dynamics 365 Finance and Operations Developments?

In this article, I will talk about some of the basic settings we made for Visual Studio, the Dynamics 365 Finance and Operations development environment. First of all, I have to say that for those who have used the MorphX IDE for 15 years like me, there is an adaptation period. Drag and drop is not like what we are used to. Compiling and seeing what you have done quickly is still a little different, but X++ is basically the same. You will adapt in a short time. Sometimes, you may complain like me about the missing features, but the innovations that come are far beyond these deficiencies. So we should look at the bright side and move forward.

We can say that we X++ developers were developing software with an old method, and the new version actually upgraded us. We have caught up on the current software development methodology. From this point of view, it seems like we are in the right place. I don’t know of any other application that contains such an advanced and up-to-date software language. Let’s appreciate X++. JIn fact, with this update, a project was carried out to completely replace X++ and switch to C#, but it was not successful. In my opinion, X++ will last as long as the product is available. Perhaps one day we can even see X++ as an independent language. This is a dream, of course, there is no such plan. But why not? Currently, we can quickly develop a web page completely independent of the design layer. There is actually a framework that will take care of the basic web needs of many businesses.

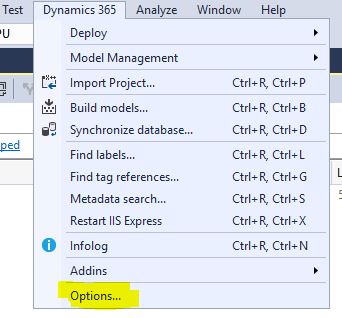
Let’s talk about some settings that are useful for you to do before starting development in Visual Studio. First, let’s look at the Options section under the Dynamics 365 menu.

Image-1

When you open the Dynamics 365->Projects page from the screen that appears, there are two options. First, it creates folders according to your object types and makes your project more compact. We used to use tools or project templates for this, but they are no longer needed. Second, it starts synchronization when you create a new object. This is a matter of preference, but I don’t want it to work every time since it would slow down my speed. Of course, do not forget to synchronize manually afterwards. Especially your tables and data structures will not work properly.

Image-2

I’m leaving the settings in the Build section as is. Sometimes, if you want Best practices not to work, you can remove them from here.

Image-3

You can choose which Best Practices will work here. My choice is based on my point of view. You can choose all the necessary ones. Compiling will be a little slow. It is possible to add new rules here. I will talk about it separately.

Image-4

Here I check the Line numbers box. Be careful with Work Wrap, it can be confusing. I’m in favor of not using it. Word Wrap is a feature used to display long lines with Scroll or underlines. Moving to the bottom line can be confusing in LineNumber. It is best not to write too long lines and use it on a wide screen. If you are in a mobile environment like me, you will manage with a 14 inch screen.

Image-5

Complete the basic settings by clicking OK. Now open the Team-Team Project Collection Settings->Source Control screen.

Image-6

Here you can adjust Check-out and Check-in settings. I disable multiple Check-out. This is up to you. It feels right to me. After check-out is done, automatic get latest is a feature that is very useful in my opinion. Make sure it is checked.

Image-7

There are good features in the Check-in Policy section. For example, you can create a Changeset Comment Policy and allow developers to enter comments in a certain format.

Image-8

In this article, I have talked about the basic Visual Studio settings for DevBox. Visual Studio is a very advanced tool. Besides these, there are many settings and features. You will get used to it in time. A topic I want to mention here is naming and adding comments. In the old version, these had very clear rules. But in the new version, I have not yet settled on what the best method is with Extension and TFS. We try different things for each project depending on the team. I am planning to write an article about this.

Regards.

www.fatihdemirci.net

TAGs: Microsoft Life Cycle Services, LCS, Azure, Azure DevOps, Visual Studio, Microsoft Dynamics 365, MsDyn365FO, MsDyn365CE, MsDyn365, Dynamics 365 Insights Power BI, Power Automate, Power Apps, Power Virtual Agents, what is Dynamics 365, Dynamics 365 ERP, Dynamics 365 CRM
What is the Model and Package for Dynamics 365 Finance and Operations and How to Create It?

In this article, I will talk about the 2nd step required to start development when you start a new project for Dynamics 365 Finance and Operations. I mentioned the first step in my previous article. I explained how we can connect a new DevBox Deploy to our Azure DevOps project. In this article, I will try to explain how to create a new Model and Package and what they do.

A model is usually a distributable software solution and can contain customizations of an existing solution or it can be a new solution. It is a structure that contains Metadata and source code files. A model always belongs to a package. Package includes one or more models. The package includes model Metadata, Binary files and other associated resources. One or more packages can be made into a Deployable package. The deployable package is used to move code to test and live environments.

To create a model, go to Dynamics 365->Model Management->Create Model.

Image-1

Fill in the required information for the model. Model name is important. You need to name it knowing that you will use it constantly and see it everywhere.

Image-2

You will see two options when you continue with Next. If this is your first model, you will want to create it in the package with the model. Therefore, choose the one above. If you already have a package and want to create a new model in it, you should choose the second one.

Image-3

This is one of the most important parts. Here you should select the reference of the standard packages you will need in the model you will create. For basic development needs, those shown in the image plus Dimension and Directory will suffice. You should not select all of them here, since it will affect your package size and compilation speed.

Image-4

When you continue, you will see the last screen. If the information is correct, you can click Finish.  If you want to set this model as the default model, don’t forget to check it. The default model can be changed later from the Config file. If you want to create it in a new project, you can use the relevant checkbox.

Image-5

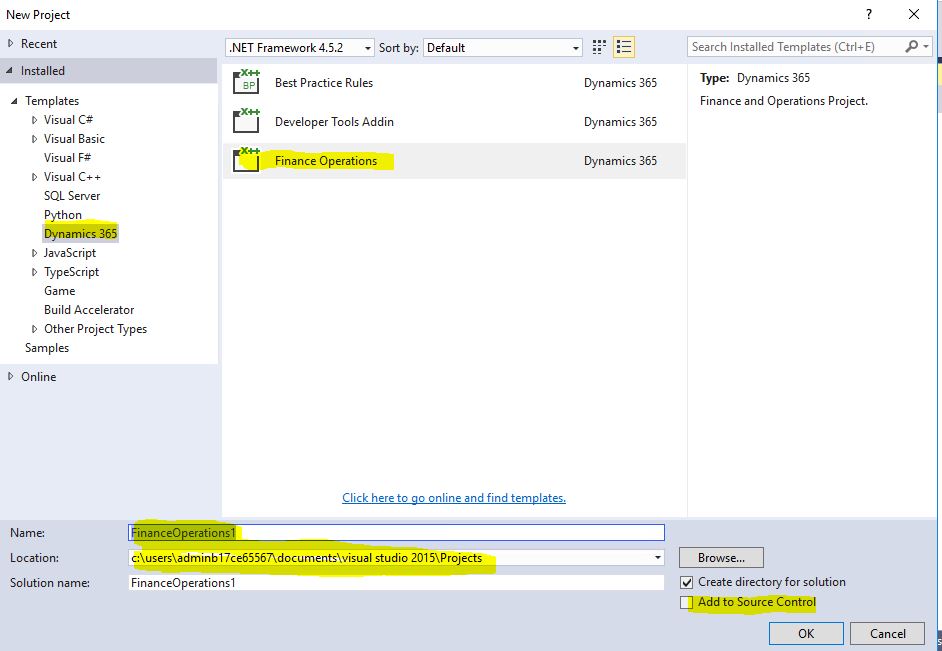
The automatic project creation screen is opened. We create a Dynamics 365 Finance Operations project. Pay attention to naming the project, you can use the previous approach. My logic includes Company Code + Person + Project name. For example. Such as DmrFDTrvLedgerJournalCreate. Be careful not to write too long. Also in the Location field I use K: or I create a folder named VSProjects and place it there. The path should not be long either. Do not skip the Add to Source Control part, you can add it later.

Image-6

This is the edited version. I didn’t use my name as the project name because it was an experiment.

Image-7

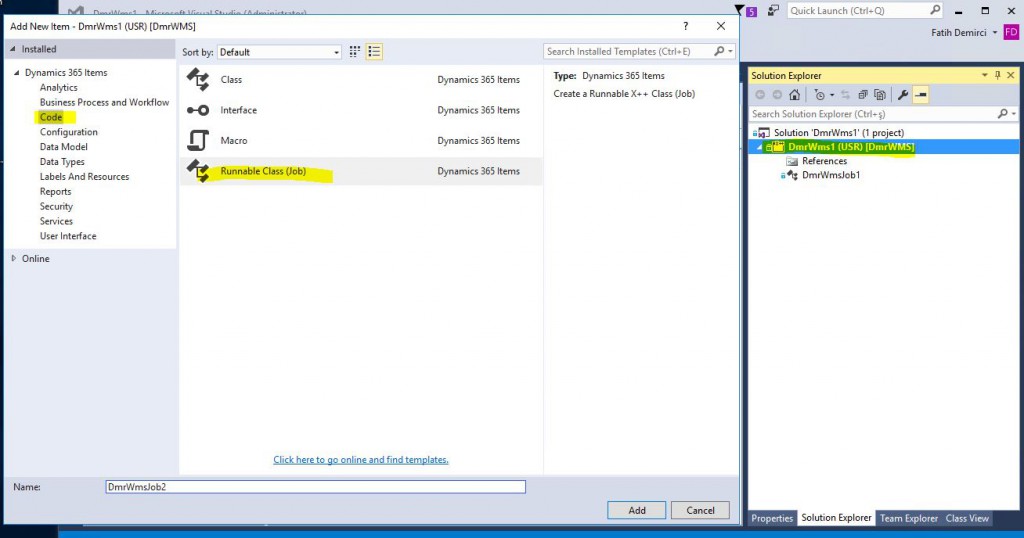
The project is automatically created in the new DmrWMS model we created. Let’s add a ne new Job and see how it looks in the package and project.  I added a new Job named DmrWmsJob1.

Image-8

When you enter K:\AosService\PackagesLocalDirectory, you will see your own package and when you enter it, the folders in the picture will be there. There is a file under Descriptor with definitions for the package. You must add this to version control.

Image-9

When you enter the package, you will see that the code for the DmrWmsJob1 you created is here. Actually, all X++ objects will be under the DmrWMS folder.

Image-10

When you look at your K:\VSProjects\DmrWms1 project, you will see that there are only project definitions here. Codes and objects are not stored here. This logic is specific to X++.

Image-11

In this article, I tried to explain what models, packages and projects are and how they are created. These are the three most important tools in the new version. Layer still exists, but it’s not so important anymore. In particular, it is necessary to understand the package logic and file structure well. We also have a project logic that is different from normal Visual Studio projects. Do not be confused by it. In my next article, I will explain how to connect these folders to version control.

Regards.

www.fatihdemirci.net

TAGs: Microsoft Life Cycle Services, LCS, Azure, Azure DevOps, Model, Packages, Microsoft Dynamics 365, MsDyn365FO, MsDyn365CE, MsDyn365, Dynamics 365 Insights Power BI, Power Automate, Power Apps, Power Virtual Agents, what is Dynamics 365, Dynamics 365 ERP, Dynamics 365 CRM
Page 2 of 212