How to Create a Batch Job with SysOperation Framework?
In this article, I will try to explain how to create a new Batch Job for Dynamics 365 Finance and Operations using SysOperation. We can say that SysOperation is a more advanced version of RunBaseBatch. It has many different uses. In this example I will explain its usage as a normal batch job. As for its structure, SysOperation uses the MVC (Model – View – Controller) design pattern. The basic classes of this structure are:
• Service: The service class is derived from the SysOperationServiceBase class. It is the class in which the process is done. Our codes should be in this class.
• Data Contract: It is the model class for which we define attributes. The DataContractAttribute attribute is used to get data from the dialog.
• Controller: The control class is derived from the SysOperationServiceController class. Stores information about the batch job. Such as dialog and progress bar.
• UI Builder: The UI Builder class is derived from the SysOperationAutomaticUIBuilder class and is used to provide more advanced interfaces to dialogs.
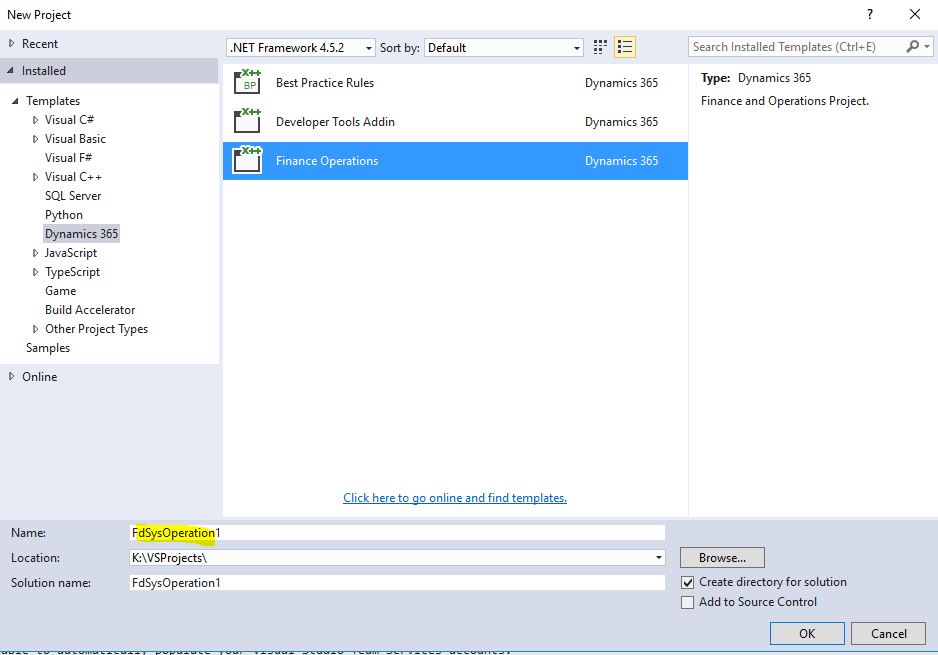
In this example I will do the same as we did with RunBaseBatch using the first 3 classes. First I create a new project.
Image-1
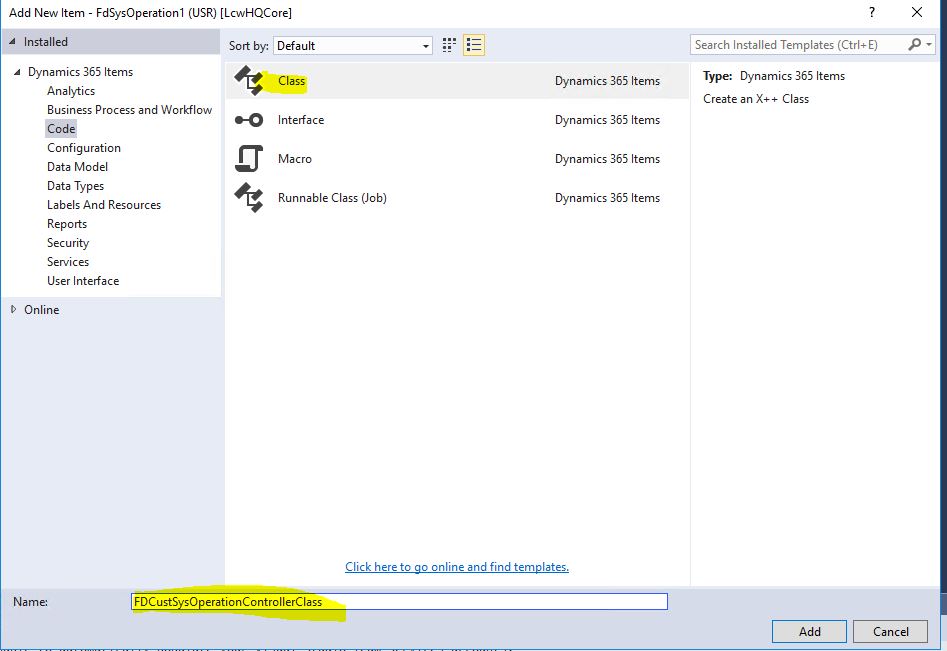
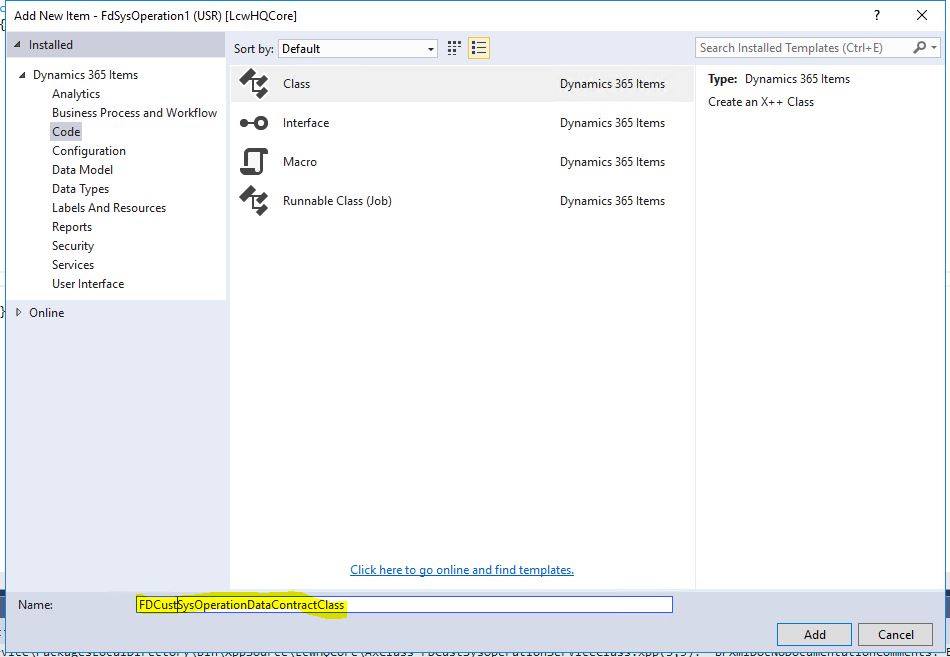
I add a new class.
Image-2
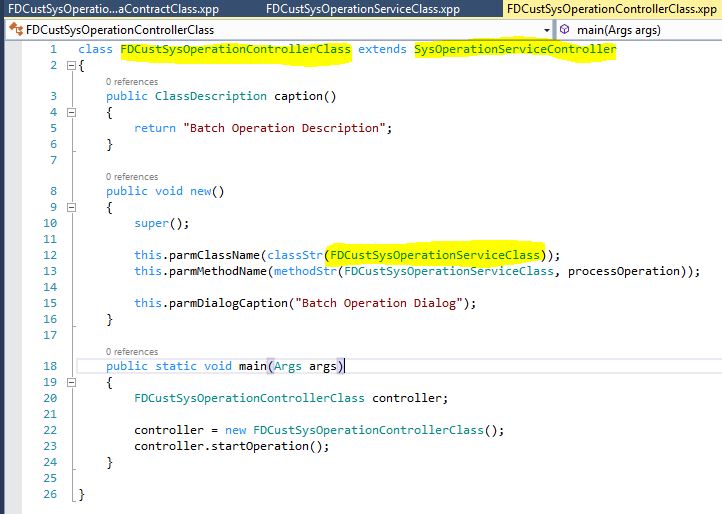
The first class is the control class. We haven’t created the service class yet, but I identified and typed its name.
Image-3
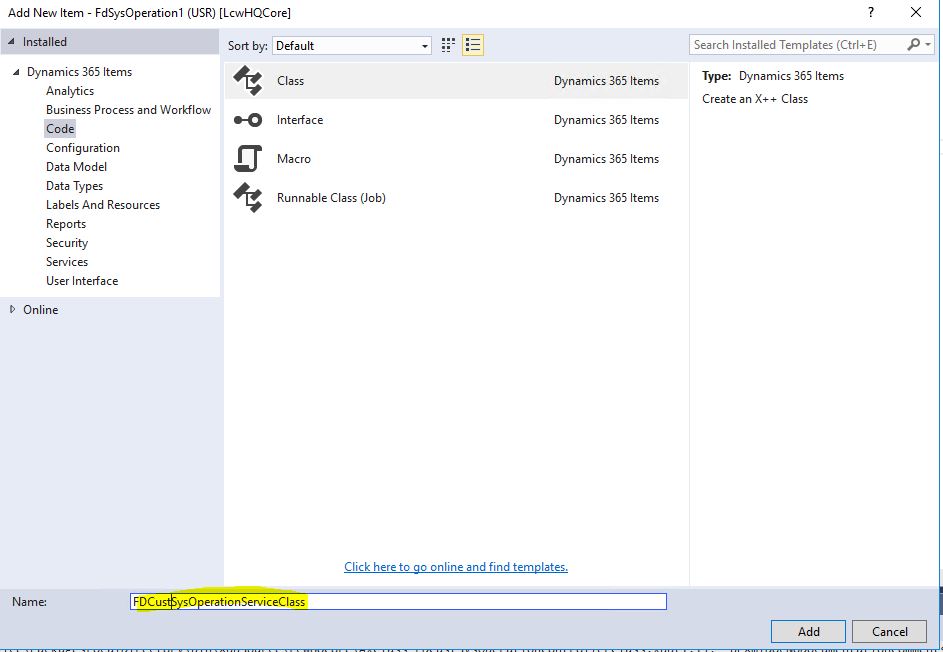
Let’s create the service class now.
Image-4
I write the code below. Actually I need the Contract class here. Let’s create it.
Image-5
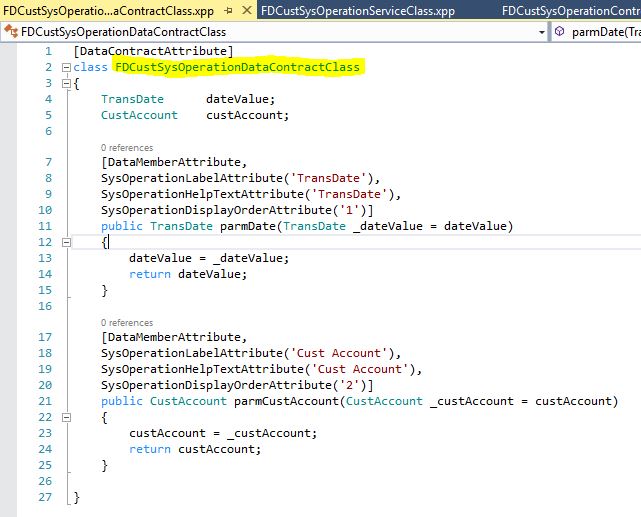
I create the Contract class. Usually this class should be created first. But if your design is clear, it doesn’t matter which one you start with. You won’t be typing these codes over and over every time, you will use them from a template.
Image-6
I want to get two variables here and edit my class accordingly.
Image-7
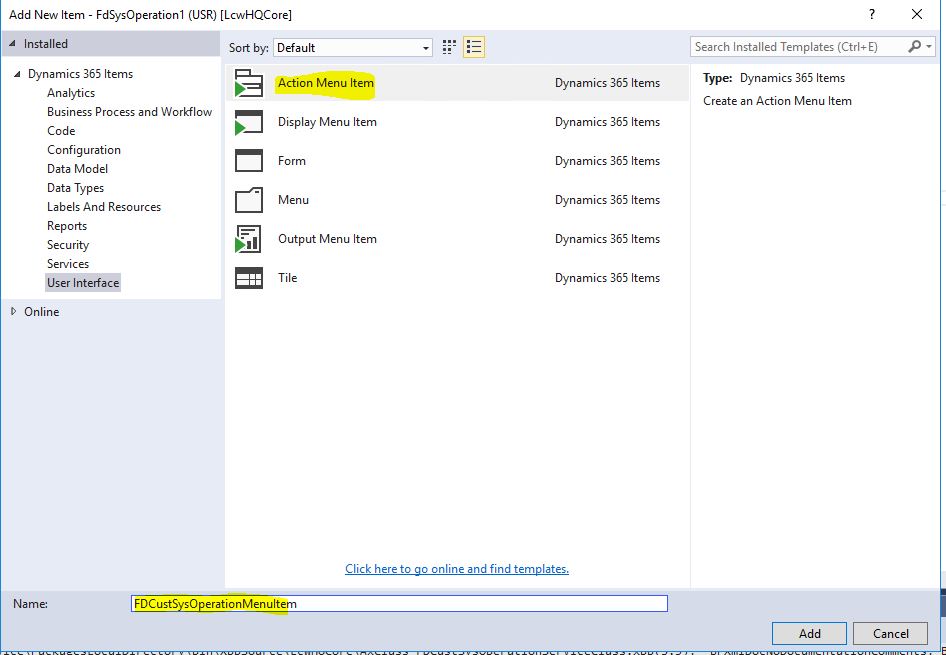
I create a MenuItem.
Image-8
I link my control class to the MenuItem.
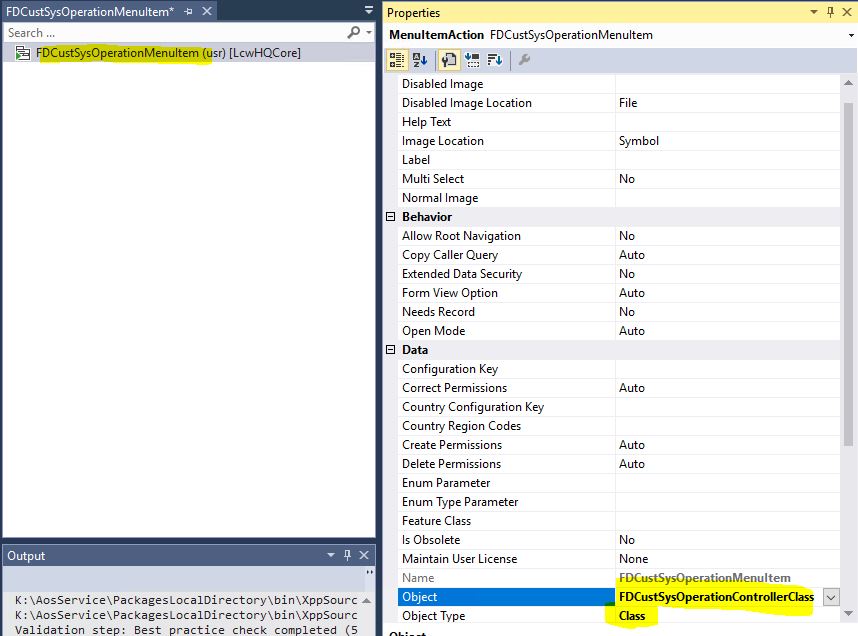
Image-9
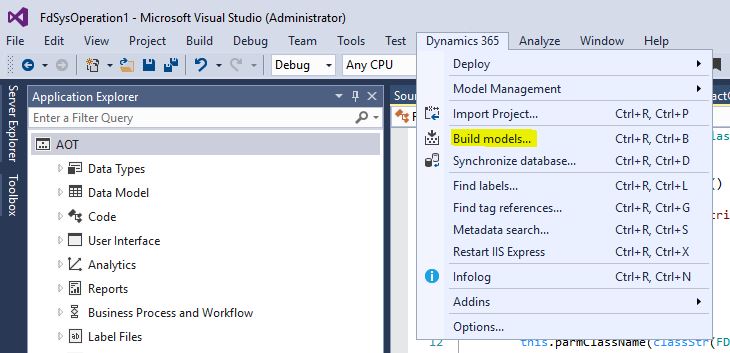
After this stage, compilation is required. It’s not enought to just compile the project. Therefore I click Build models.
Image-10
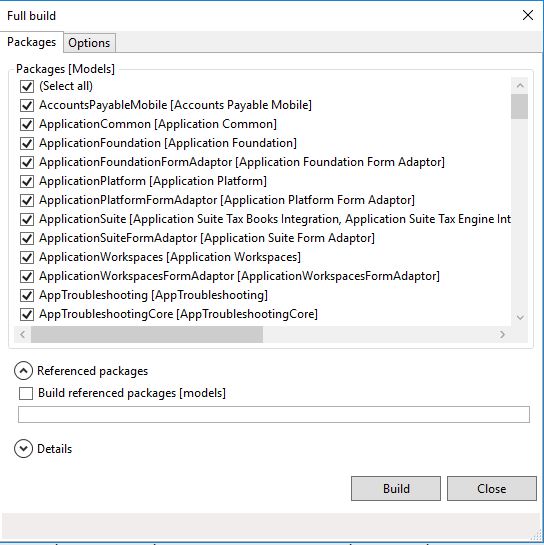
Click Select all on the screen that opens and start a Build operation.
Image-11
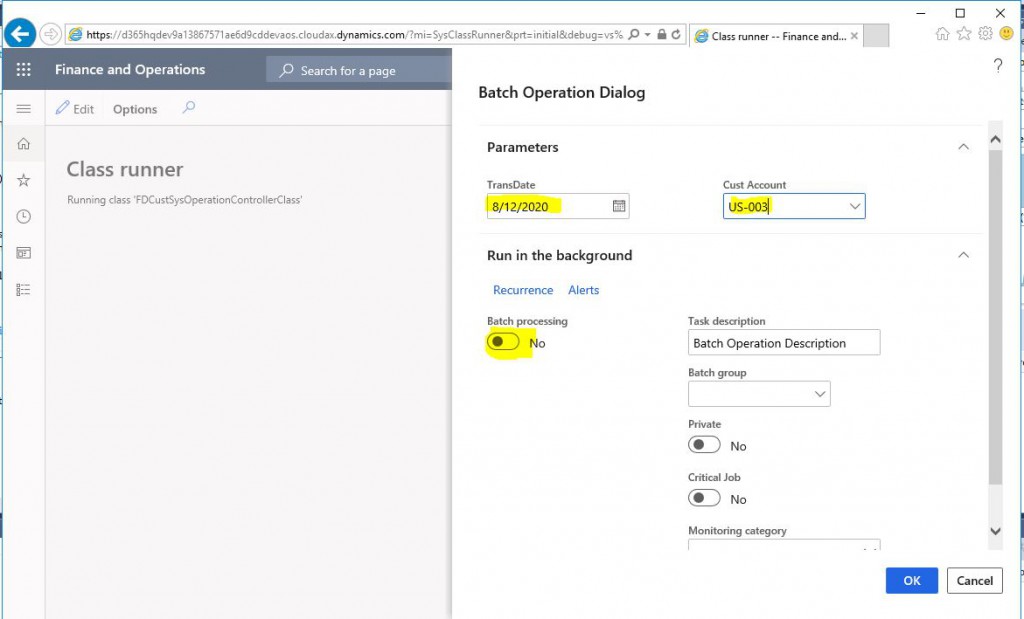
After the Build operation is completed, mark your MenuItem as the starting object and run the project. Our class worked. You can run it directly just like you did with RunBaseBatch.
Image-12
You can add it to a batch job if you want. I added it to a batch and set it to run one time.
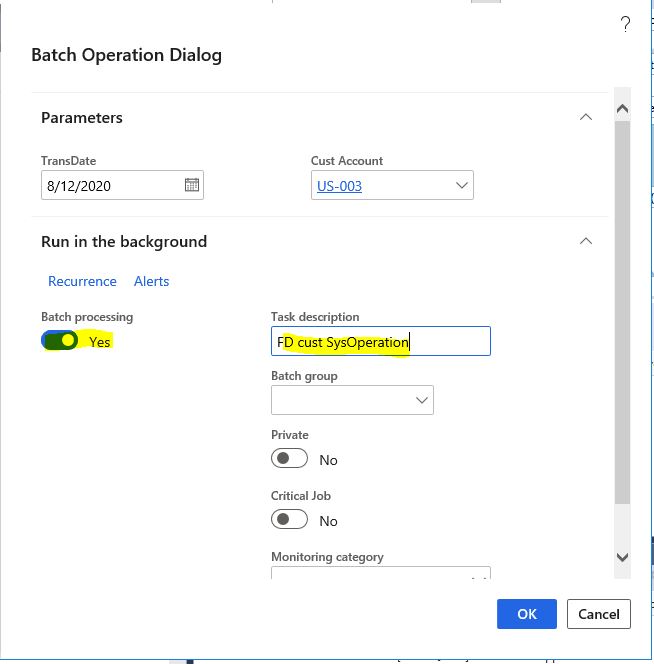
Image-13
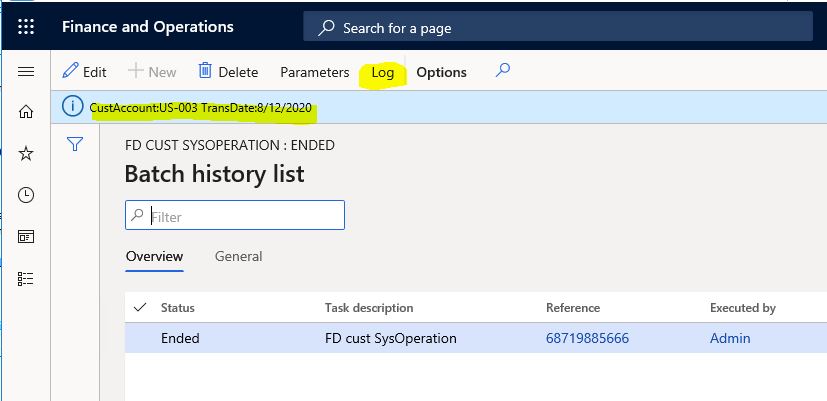
Now let’s open the Batch Jobs form. Let’s find our own batch job and take a look at the progress. It is Ended, which means it worked and finished. If it was a recurring job, it would be in Waiting state. I click on Batch job History to check what our batch job has done and whether it worked correctly.
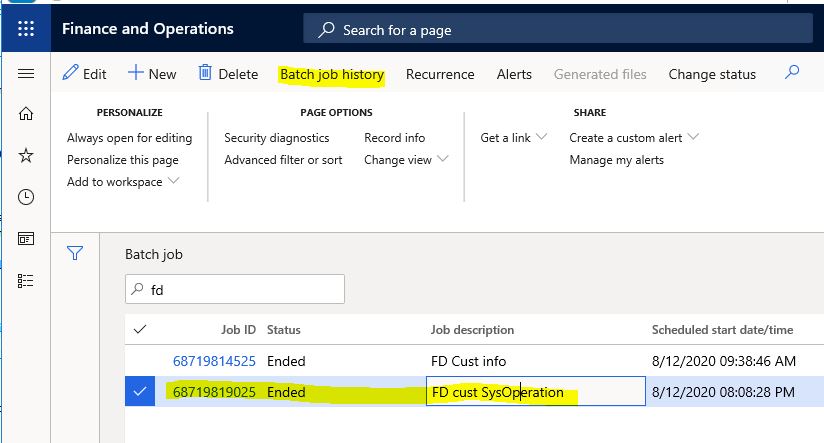
Image-14
I click Log from the details of the job and it shows the output of the batch. It worked without any problems.
Image-15
In this article, I tried to explain how to create a new batch job using SysOperation. SysOperation is a very extensive topic. I will continue to explain it with different viewpoints. Especially Parallel processing works very well in terms of performance. I’ll explain how to use it in an example.
Regards.
www.fatihdemirci.net
TAGs: Microsoft Life Cycle Services, LCS, Azure, Azure DevOps, Batch Jobs, SysOperation, Microsoft Dynamics 365, MsDyn365FO, MsDyn365CE, MsDyn365, Dynamics 365 Insights Power BI, Power Automate, Power Apps, Power Virtual Agents, what is Dynamics 365, Dynamics 365 ERP, Dynamics 365 CRM
