How to Create a Batch Job with RunBaseBatch Framework?
In this article, I will try to explain how to create a new Batch Job for Dynamics 365 Finance and Operations. I will create an example using RunBaseBatch. I will give examples with SysOperation in my future articles. Let’s look at what batch job is. It is an infrastructure that is used to run a job on a different server and at a certain time, repeatedly. Let me give you the simplest example. The central bank announces the exchange rates at a certain time every day. You need to take these values and save them in the system. You have written a class for this and that class connects to the service and gets the values. However, this has to be triggered at the same time every day. This is where batch jobs come in and allow you to make these settings.
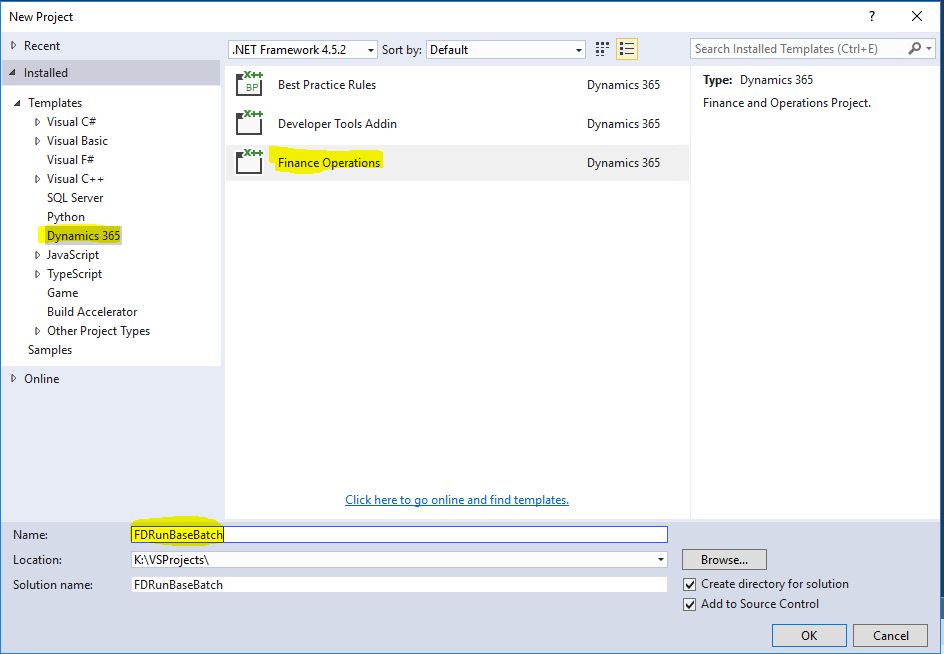
In this example we will create and run a very simple class. First I create a new project.
Image-1
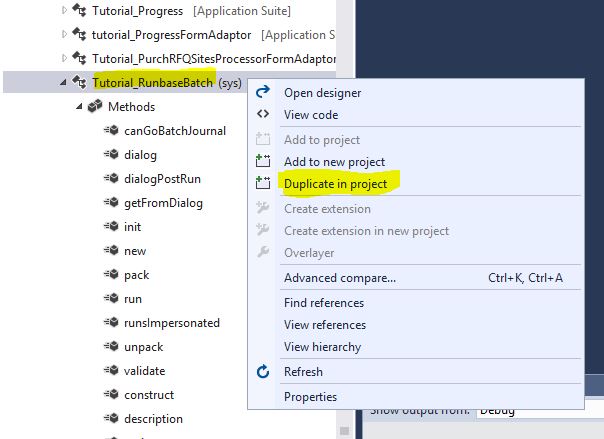
After the project the class is required, but we will not create it from scratch. We will duplicate the Tutorial_RunBaseBatch class from the samples.
Image-2
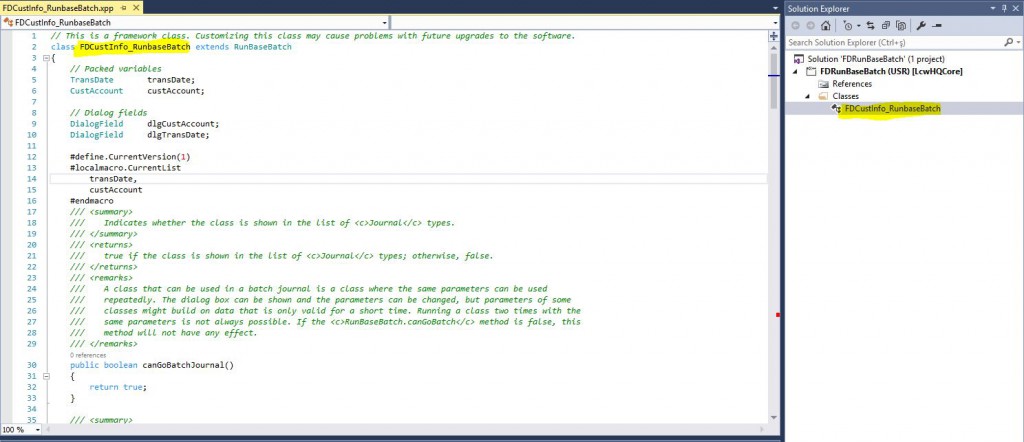
Let’s give a name to the class we duplicated. There are a few things to consider. First of all, don’t change the structure of the class. It works smoothly as is. If you don’t need dialogs, you can clear them. It is essential to derive from RunBaseBatch. You must use Pack Unpack. Pack Unpack ensures that your parameters are stored in the system. It is such an extensive topic that needs a dedicated article.
Image-3
When a class is duplicated, the name of the old class remains in a few places. These need to be fixed. I changed the Main method to this.
Image-4
Similarly, I changed the construct method in this way.
Image-5
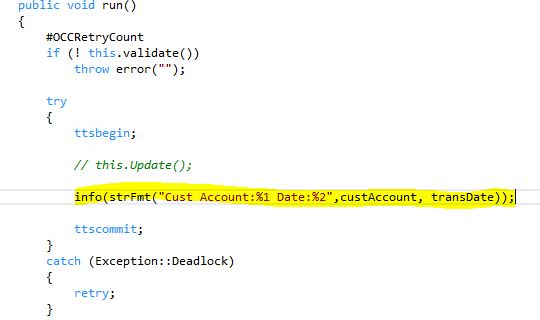
Run method is where the main work is done. In this sample class a dialog opens and asks for the date and client code. I print the values coming from this dialog in the run method.
Image-6
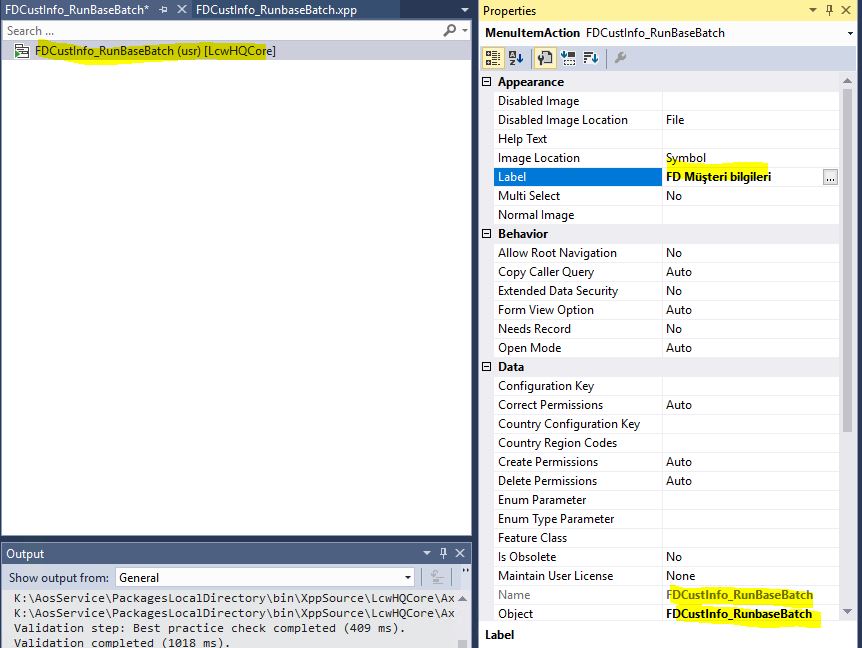
I create a new MenuItem to run the class. I select the Object and ObjectType.
Image-7
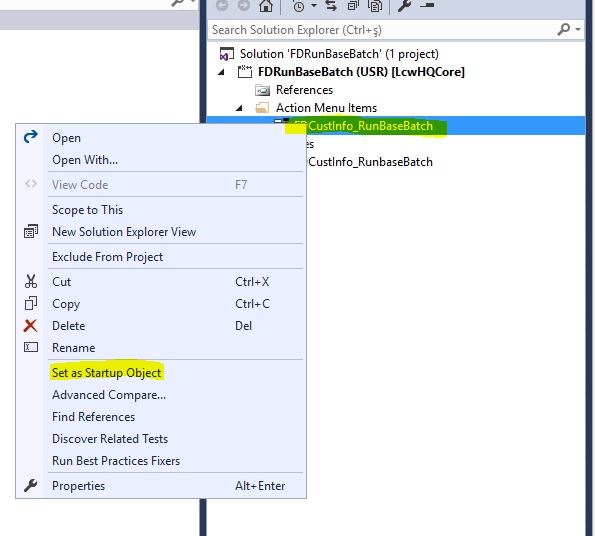
I mark the MenuItem as the starting point.
Image-8
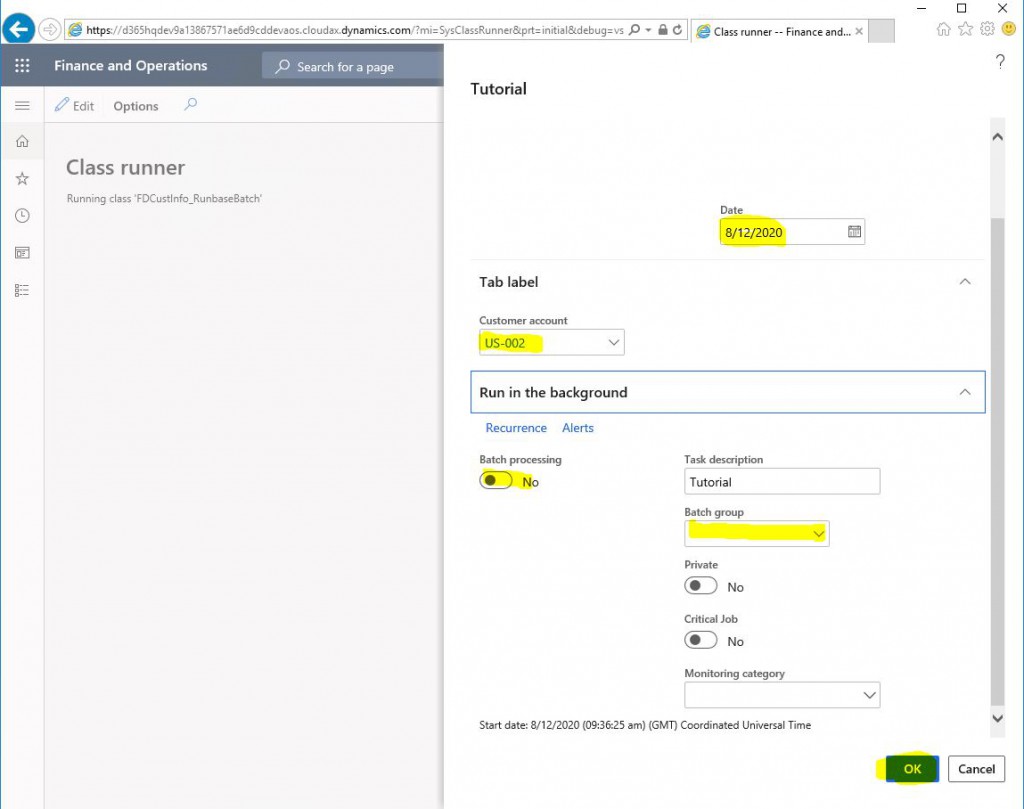
When I run my project, the dialog screen opens. I enter a date and select a client. I select No for Batch processing. When I click OK, the class will directly work.
Image-9
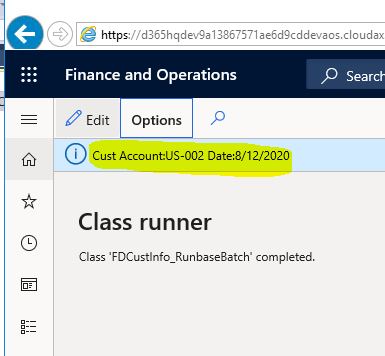
The class worked and displayed the output on the screen.
Image-10
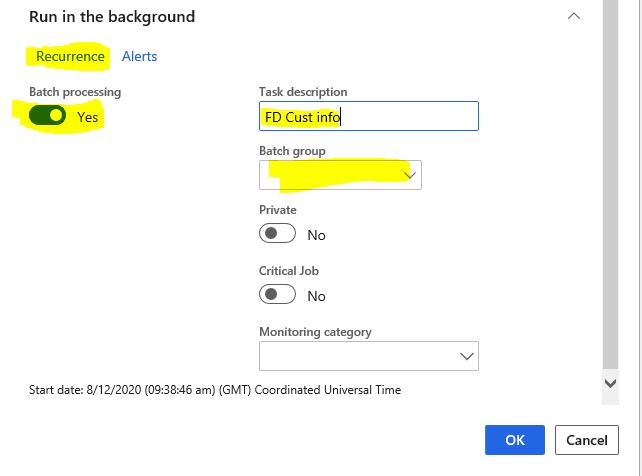
Now let’s see what happens when I click Yes. Of course, this appears because we derived our class from the RunBaseBatch class. After I defining a few important areas, I click Recurrence.
Image-11
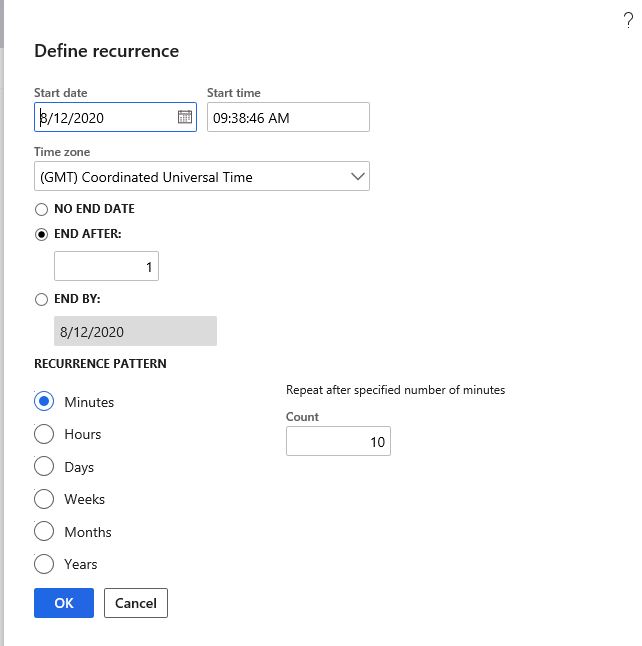
Here I can determine how often and when this job will run. I can get it running every 10 minutes if I want, but it’s enough for me to run it once, so I leave it like that.
Image-12
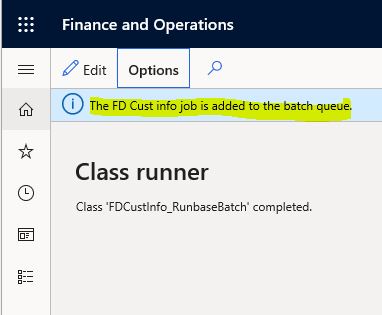
The class did not work when I closed the screens by clicking OK. Instead, it showed the message saying that it added to queue.
Image-13
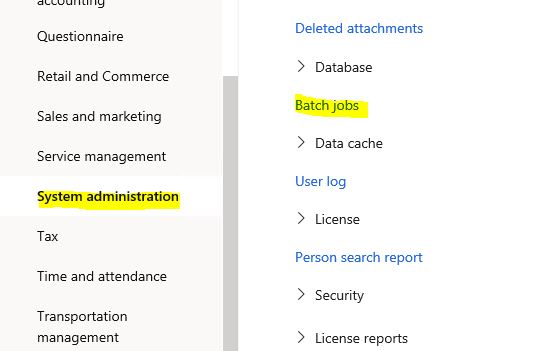
Now let’s open the Batch Jobs form.
Image-14
Let’s find our own batch job and take a look at the progress. It is Ended, which means it worked and finished. If it was a recurring job, it would be in Waiting state. I open the advanced form by using the Switch to enhanced form option.
Image-15
This form includes more details. I will not mention all of them. I click on Batch job History to check what our batch job has done and whether it worked correctly.
Image-16
When I click Log from the screen that opens, I see that the date and customer information I selected appear on the screen. So my class worked. If there was an error I could check it here.
Image-17
In this article, I tried to explain how to create a new batch job using RunBaseBatch. Batch job is a very extensive topic. I will continue to explain it with different viewpoints.
Regards.
www.fatihdemirci.net
TAGs: Microsoft Life Cycle Services, LCS, Azure, Azure DevOps, Batch Jobs, RunBaseBatch, Microsoft Dynamics 365, MsDyn365FO, MsDyn365CE, MsDyn365, Dynamics 365 Insights Power BI, Power Automate, Power Apps, Power Virtual Agents, what is Dynamics 365, Dynamics 365 ERP, Dynamics 365 CRM
