In this article, I will try to explain how to move the developments we made from Visual Studio for Dynamics 365 Finance and Operations to Test and Live environments. I thought of wrapping it up in a single article, but I realized it would be too long so I divided it into sections. In this first article, we will make a new development and compile it, then we will do the first tests in our development environment, and finally, we will send our development to Azure DevOps. In the other articles of this series, I will explain how to Build in Azure DevOps and how to move the package to test and live environments.
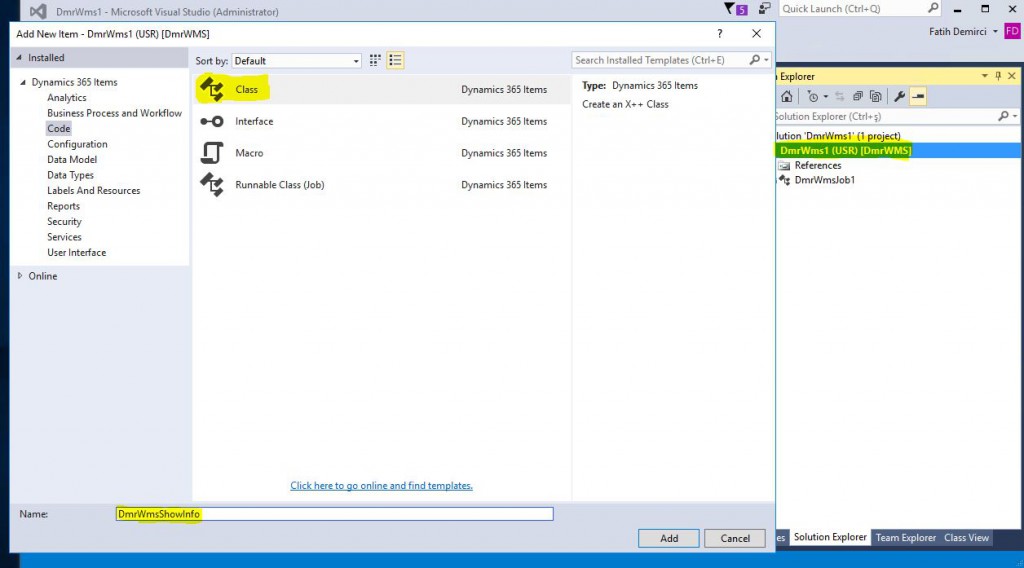
Let’s have a look at our example. I will write a simple class and make an information screen appear when it is run. Then I’ll create a MenuItem and connect it to the Menu. In my previous articles, we created the DmrWMS model and the DMRWms1 project. I will use this project. Right click on the project and click Add New Items. Select Class as its type, name it and click Add.
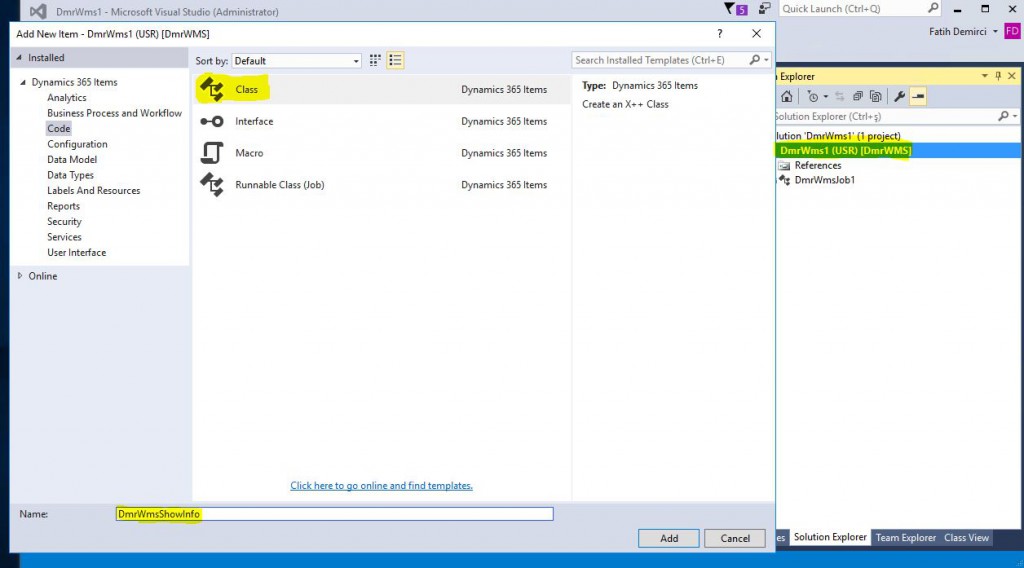
Image-1
I added the following codes to the class. It has a very simple structure. I made it work on its own with Main. I gave an Info in the Run method.
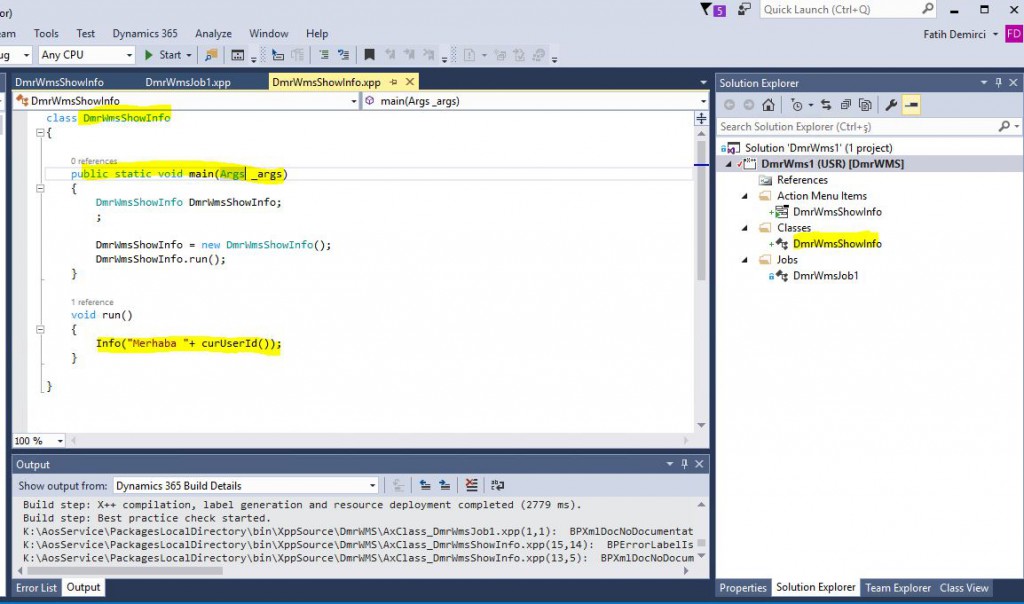
Image-2
Now let’s create the Menu Item that is necessary to run our class and add it to the menu. Select Action Menu Item from the Add New Items section, name it and click Add.

Image-3
Select the Object Type Class from the resulting Menu Item properties. Select the class you created as Object. Do not forget to set Label as it will appear in the menu.
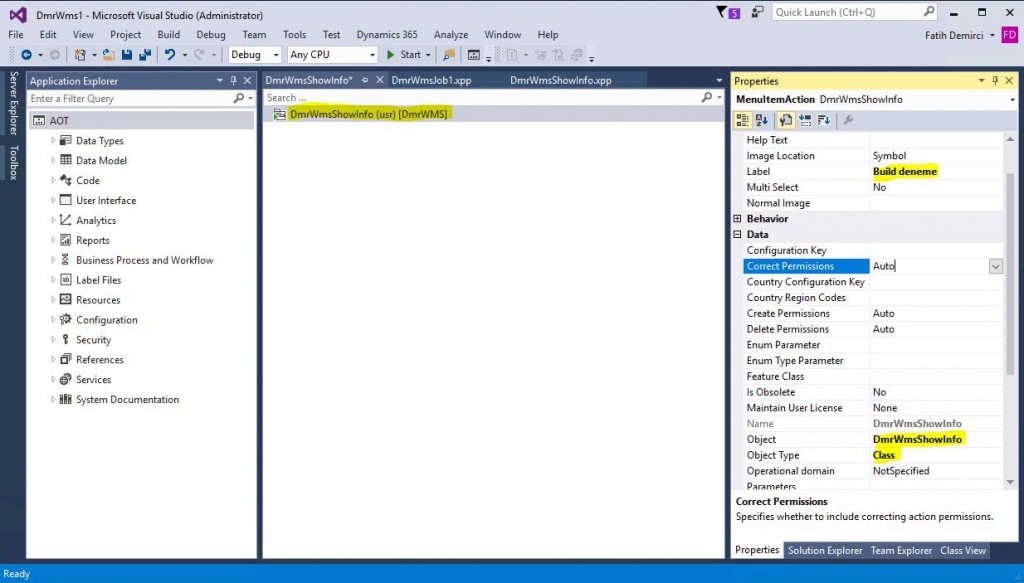
Image-4
Let’s test the development now. Right click on the project and click Build.
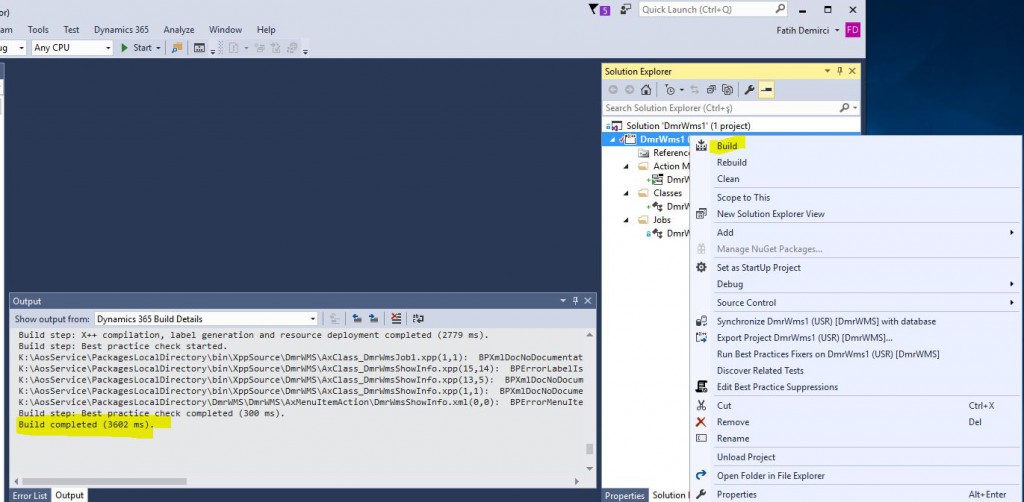
Image-5
If Build is completed without any errors, mark the Menu Item we created as Set as Startup Object and run it by clicking Start.
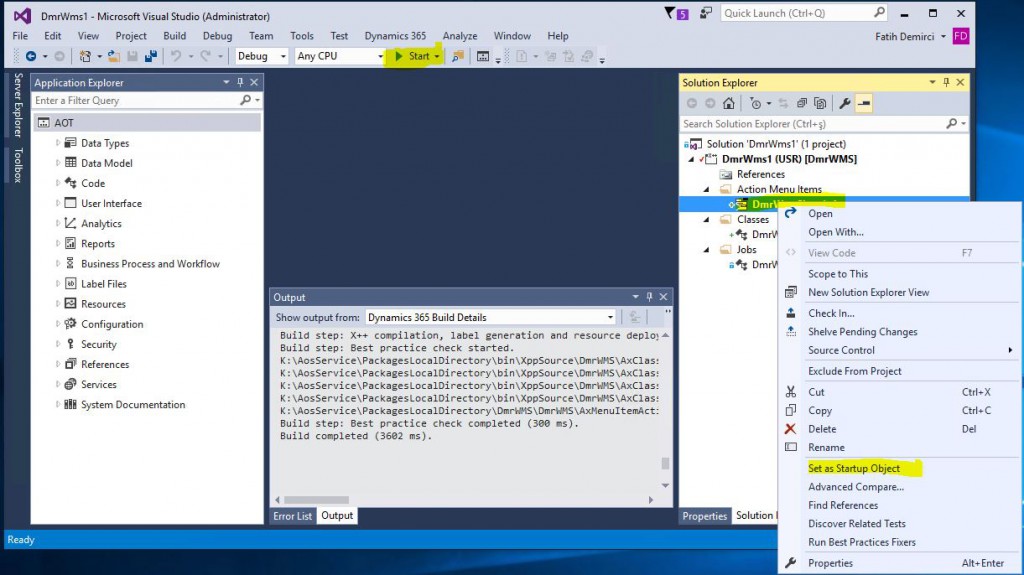
Image-6
It called the Menu Item class and displayed the notification on the screen. Our code works J
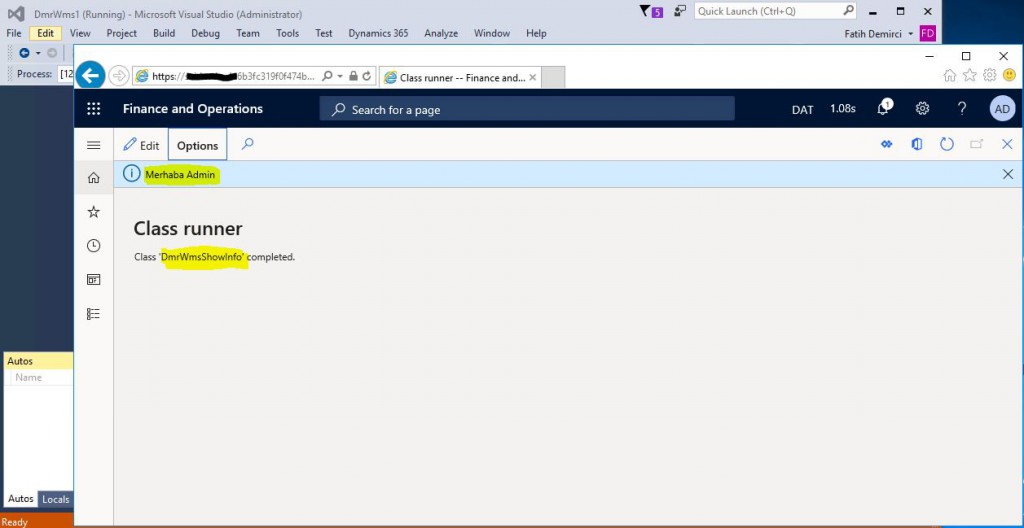
Image-7
Now we can add it to a menu. Since I want to add it to a standard menu, I must use Extension. I will explain the Extension logic in my next articles, but here you can think of it as an extension of the standard object. You can add new things without breaking the standard. I created an Extension of the AcountsPayable menu with the Create extension option, as shown in the picture.
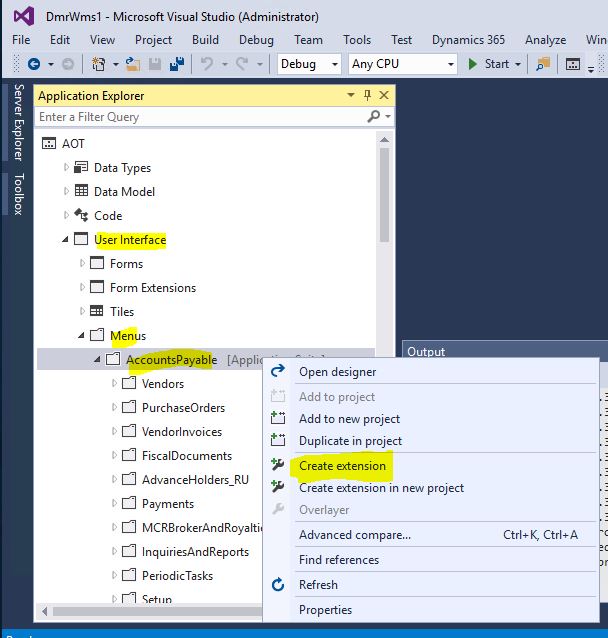
Image-8
I drag and drop my own Menu Item under PeriodicTask to the resulting menu.
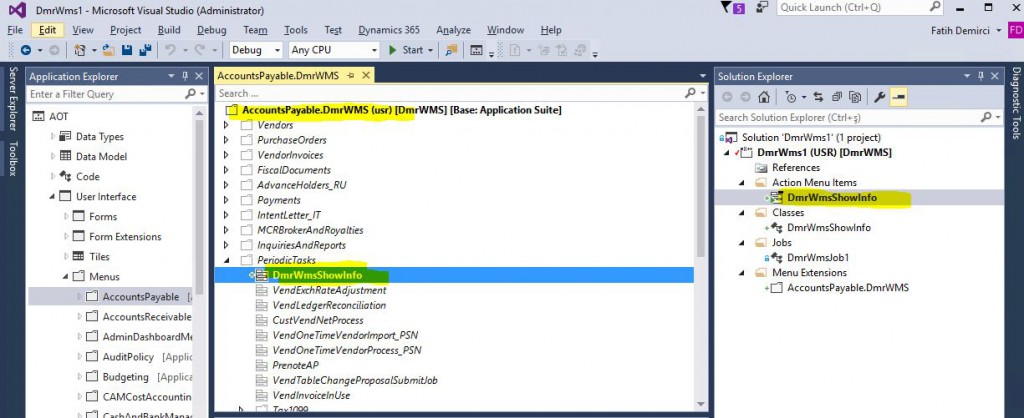
Image-9
I Build my project again and run it. Build Test appears in the menu. Our development is almost ready to send to version control. Normally it is necessary to add security related objects here. I’m skipping them for now.
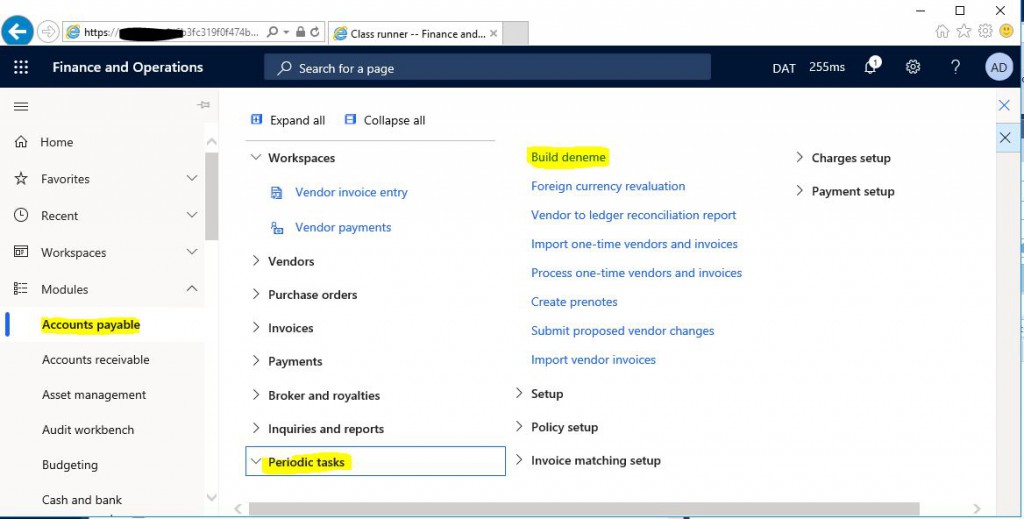
Image-10
I click Team Explorer-> Panding Changes.
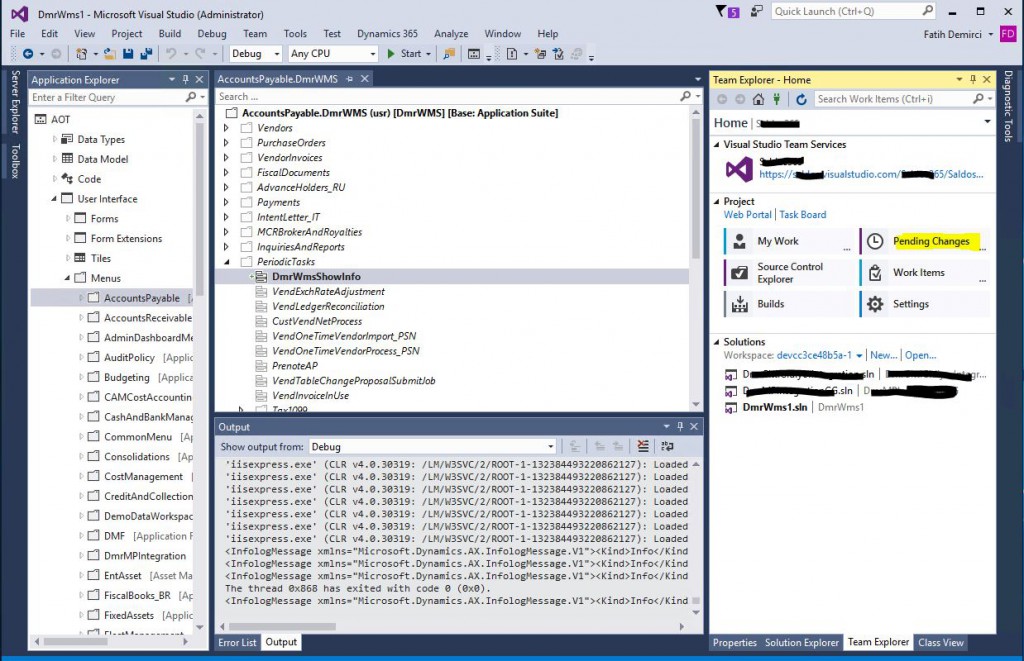
Image-11
I should see all the objects I’ve created. If there is something missing, I need to add it with Add to Source Control. If you have followed me here, it will automatically add when the object is created. I add a comment and click Check In.

Image-12
I click Yes to complete the process.

Image-13
When I check my Azure DevOps project, I can see all my objects. I am now ready to run Build.

Image-14
In this article, we have made the initial preparation to move developments to test and live environments. We created a simple project, performed the first tests and sent it to Azure DevOps. After this stage, if I had a Dev Branch, I had to perform Merge first. But in our example, since we work directly with main, we are ready to start Build. I will talk about how to perform Merge later.
Regards.
www.fatihdemirci.net
TAGs: Microsoft Life Cycle Services, LCS, Azure, Azure DevOps,Build, Deploy to Test, Microsoft Dynamics 365, MsDyn365FO, MsDyn365CE, MsDyn365, Dynamics 365 Insights Power BI, Power Automate, Power Apps, Power Virtual Agents, what is Dynamics 365, Dynamics 365 ERP, Dynamics 365 CRM
