How to Move Developments to Dynamics 365 Finance and Operations Test and Live Environments? 2- Merging Code Between Dev and Main Branch.
In this article, I will talk about Merge, which is the second step required to move the developments we made from Visual Studio for Dynamics 365 Finance and Operations to Test and Live environments. Merge is basically to transfer code between different folders and branches. Our example has two Branches: Dev and Main. The general approach is to transfer the code to Test environment with Dev Build. Then for the approved developments, it is necessary to perform Code Merge from Dev Branch to Main Branch and then create a Build on Main and transfer to live environment. Of course, these are just approaches that you may choose from. You should decide on one of these methodologies according to your own team and the requirements of the project.
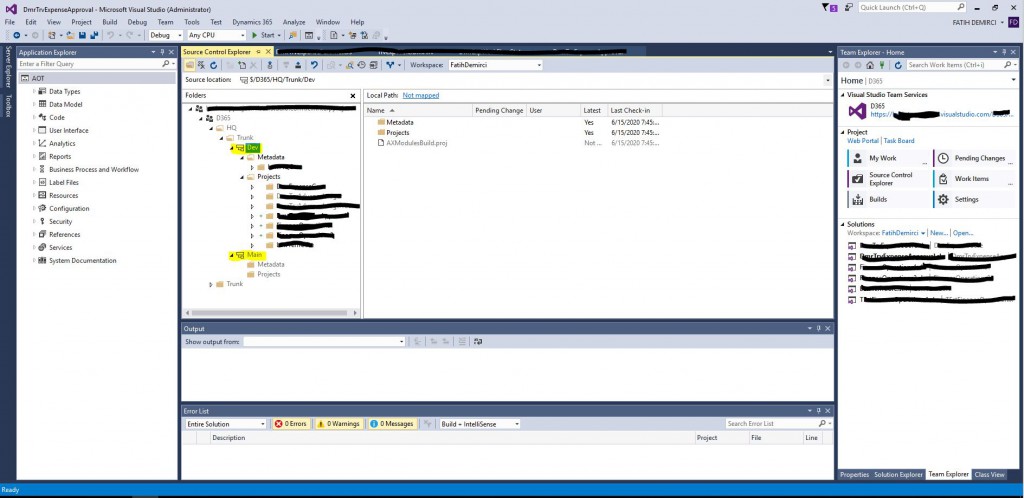
So, how do we Merge from Dev to Main? First, open Visual Studio with admin rights. Open the Team Explorer-> Source Control Explorer screen. In my previous articles, I explained how to connect DevBox to Azure DevOps. So, I directly see my Azure DevOps project. We used a different folder structure in this project.
Image-1
Right click on the Branch you want to start Merge and select Branching and Merging-> Merge.
Image-2
Source Control Merge Wizard opens. Source Branch and Target Branch appears automatically. You can change them if you want. Here I need to talk about Changeset. Changeset is a structure that contains all the objects in a check-in. An automatic ID is created and the transfer operations are usually done with this ID. Select Selected changesets here and continue. I will talk about the other option below.
Image-3
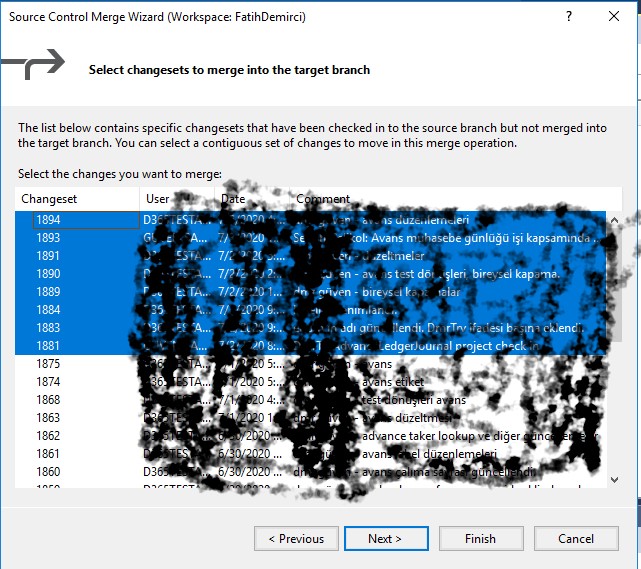
All Changesets that have not been merged will be listed. You are free to choose.
Image-4
When choosing, be careful not to leave any spaces between Changesets. Spaces can cause a lot of Conflicts and they are annoying to deal with. You should track this regularly and properly. Click Next to proceed.
Image-5
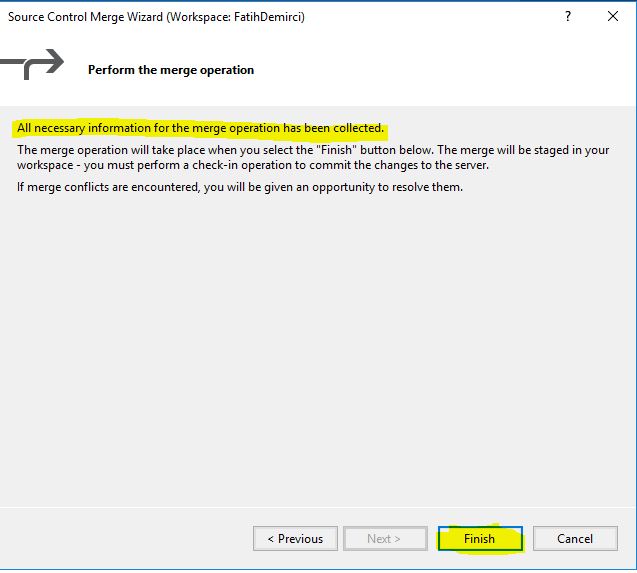
A summary screen appears and if you click Finish, the process is completed. In this environment, I do not continue as Merge is not ready yet.
Image-6
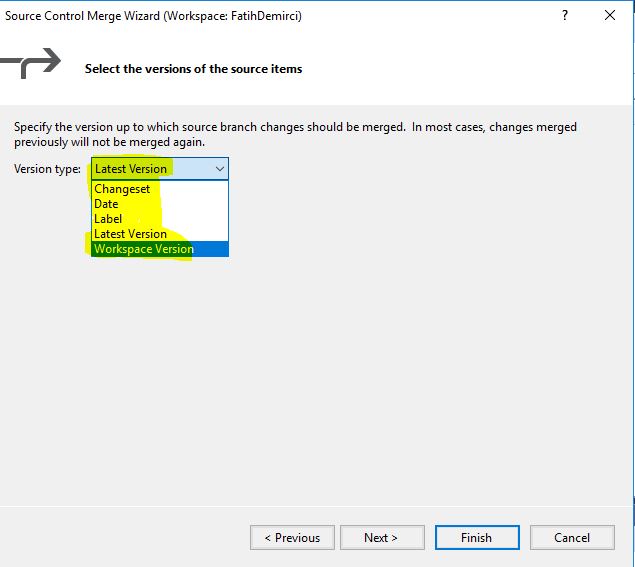
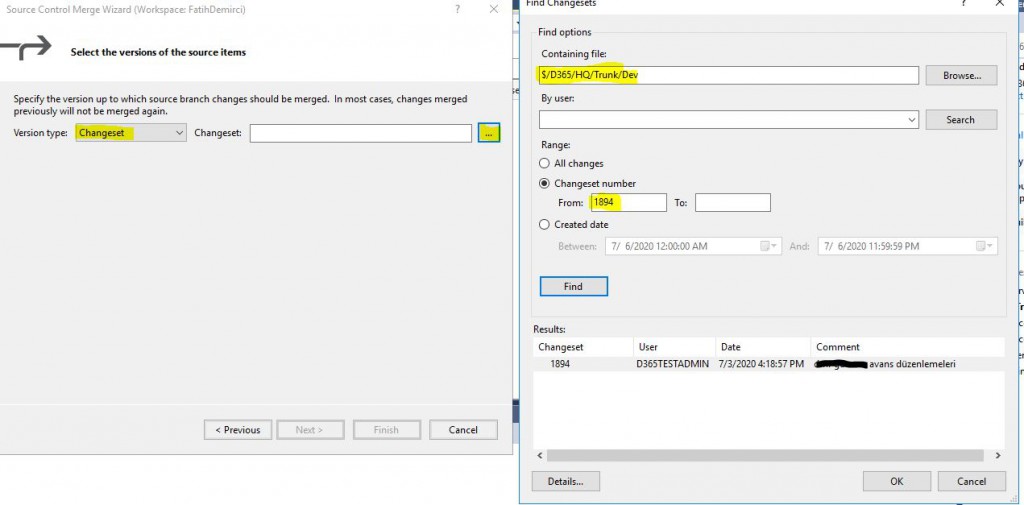
Let’s see what happens if we continue with the other option. If proceed by selecting All changes up to a specific version, we can Merge according to certain types.
- Changeset: When you select this option you can enter any Changeset number. In addition, you can search for Changeset by clicking (…) here and select the Changeset you want from the search window.
- Date: This option allows you to choose changes for a certain date.
- Label: It is a mechanism that allows you to take snapshots of your development. If you use it, you can make choices for it here.
- Label Version: It allows you to choose versions if you are using the Label mechanism.
- Workspace Version: With this option, Devbox allows you to choose the workspace you are working on.
Image-7
If you choose Changeset, you can search for a specific Changeset number and proceed with the results.
Image-8
In this article, I talked about the Merge logic used for transferring code between branches. It is not essential to transfer the code for the test and the live, but it is necessary to determine the right strategy and automate them. The DevOps engineer has become a very important role for our applications. Now that we have transferred the codes, we can move on to the 3rd stage, Build creation.
Regards.
www.fatihdemirci.net
TAGs: Microsoft Life Cycle Services, LCS, Azure, Azure DevOps, Merge, Microsoft Dynamics 365, MsDyn365FO, MsDyn365CE, MsDyn365, Dynamics 365 Insights Power BI, Power Automate, Power Apps, Power Virtual Agents, what is Dynamics 365, Dynamics 365 ERP, Dynamics 365 CRM
